VPN stands for Virtual Private Network. In this tutorial we will discuss how to create a VPN connection to the Heritage network when you are off campus. This can be useful if you want to access resources that are only available on-site such as the file server or a desktop computer. Establishing a VPN connection between your computer and Heritage will create a secure tunnel where data can flow securely between your computer and the Heritage network.
Creating a VPN Connection
Windows 10
- Open the Start menu and choose Settings. Look for and open Network & Internet
- From the Network & Internet sub-menu, choose VPN
- Click Add a VPN connection
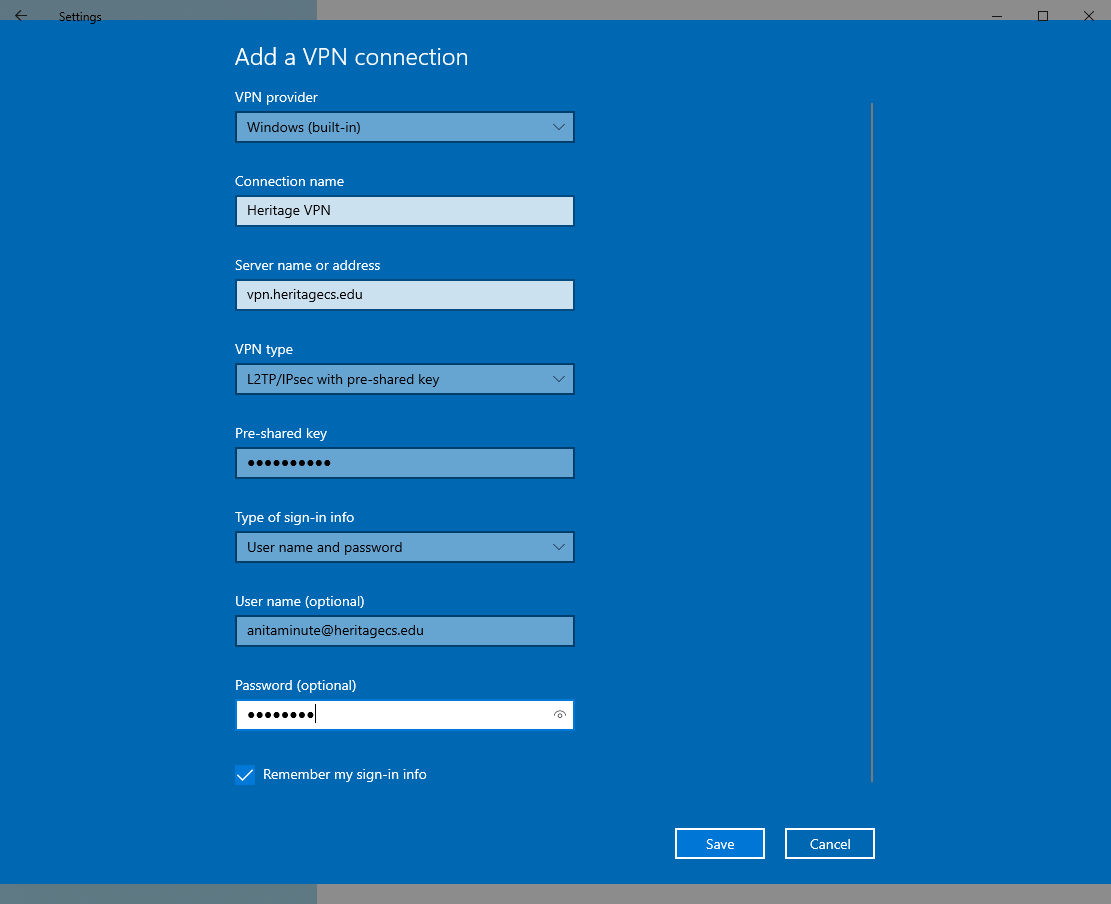
- In the VPN Provider field choose Windows (built-in)
- In the Connection name field type a friendly name such as Heritage VPN
- In Server name or address field type
vpn.heritagecs.edu
- In the VPN type field choose L2TP/IPsec with pre-shared key
- Enter the Pre-shared key into the Pre-shared key field. The Pre-shared key can be found in the Heritage VPN Access email sent by a Heritage IT Admin.
- In the Username field type your full Heritage Username – this is likely your email address (such as anitaminute@heritagecs.edu).
- Type your Heritage Password into the Password field.
- Click Save to save the settings.
- The VPN connection is now configured. To establish a VPN connection between your computer and Heritage simply choose the new connection and press Connect.
You can also access this connection extremely easily from the network icon in the Taskbar. In the lower-right corner of the Taskbar, look for the network icon (it could be a wireless icon if you’re on Wi-Fi or a little Monitor-with-network-cable icon if you’re using a wired connection). Click the icon. If you completed the steps above to create a VPN connection, the new connection will be available from this menu. Just click it a choose Connect.

iOS
Creating a VPN connection profile is easy to do on iOS and provide a secure tunnel from your device into the Heritage network.
- Open the Settings app.
- Go to General -> VPN. You’ll need to scroll down as its near the bottom.
- Choose Add VPN Configuration…
- In the Add Configuration screen for Type choose L2TP
- In the Description field type a friendly name such as Heritage VPN
- In Server field type
vpn.heritagecs.edu
- In the Account field type your Heritage Username – this is likely your email
- Type your Heritage Password into the Password field.
- In the Secret field, very carefully, type in the Secret code. Contact the IT department for this code.
- Choose Done at the top right.
- The VPN connection is now configured and you will move back to the VPN screen. To test the connection click the slider to the right of Status. The connection will be established and the status will change to say Connected.

Additionally, now that the VPN settings are configured you can turn the connection on and off easily from the main Settings App screen. A new entry called VPN will have appeared near the top.

MacOS
Creating a VPN connection profile is easy to do on iOS and provide a secure tunnel from your device into the Heritage network.
- Open the System Preferences app
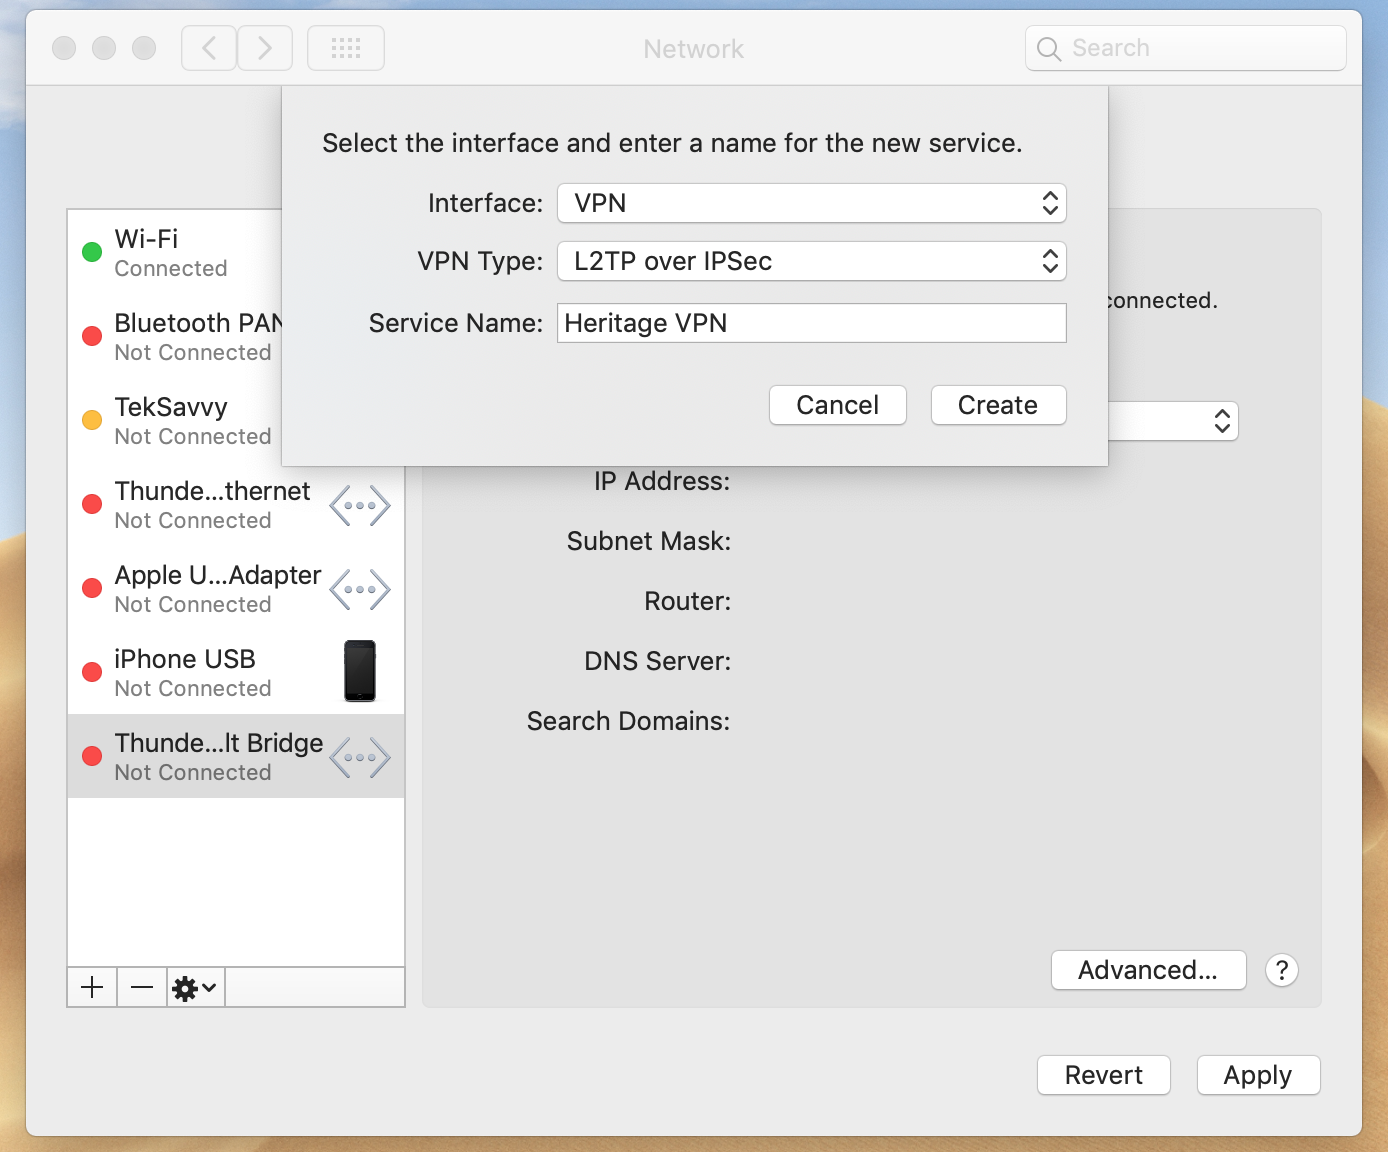
- Go to Network. Click the + (plus) button in the lower left-hand corner of the Network window to add a new connection
- In the Interface drop-down choose VPN
- In the VPN Type drop-down L2TP over IPSec
- In the Service Name field type a friendly name such as Heritage VPN. Click Create
- In Server Address field type
vpn.heritagecs.edu
- In the Account Name field type your Heritage Username – this is likely your email
- Click the Authentication Settings button. Type your Heritage Password into the Password field
- In the Shared Secret field, very carefully, type in the Secret code. Contact the IT department for this code. Click OK
- Choose Apply in the bottom right
- The VPN connection is now configured. To initiate the connection between your Mac and the Heritage campus click the Connect button. You may also choose to enable the Show VPN status in the menu bar to provide a quick and easy place to initiate the connection. With this enabled, you can simply click Connect Heritage VPN to make the connection.

Other Awesome Stuff
Now that you’ve established a VPN connection you can do awesome stuff like remotely access your desktop computer as if you were sitting in the office at Heritage.
If you have a Heritage-deployed laptop, after establishing the VPN connection, you should be able to access your Home drive and the Staff drive like you normally would by going through File Explorer and opening those drives. Please note that opening those network locations will be slower over the VPN connection than when you are physically on-site.