Writing a Heritage Syllabus

The Big Picture

The mission of Heritage Baptist College is to provide an evangelical, faith-based, university-level education to equip students for life and service in the church, community, and the world.

Every certificate and degree we teach at Heritage seeks to fulfill that mission. Further, each certificate and degree we teach has its own mission: to prepare students for pastoral ministry, or youth ministry, or intercultural ministry, for example. Each course has been created to fit into that bigger picture.

So, the course you are teaching already has a course description, which gives a broad-strokes explanation of what that course is about. This ensures that the course will fit into the bigger picture as it should. What exactly is taught, how it is taught, and how it is evaluated is entirely up to you as the course’s professor. Those are the elements you will be creating in the syllabus.

The syllabus is a legal document between the professor and the students. Once it has been submitted and posted, it cannot be changed without the consent of the students in the class. Further, it is the professor’s obligation to follow the syllabus to the very best of his or her ability.

This document will help you to craft a helpful syllabus.

Elements of the Syllabus

This section will walk you through the syllabus elements and how best to complete them.

  1. Instructor: Fill in your name (and possibly how you wish to be addressed), and when and how you are available for consultation. We do not recommend giving students your private email or cell phone number. Please use a Heritage email, and if you wish for students to be able to text you, sign up for text notifications on myHeritage and tell them they can text you via myHeritage. This provides privacy protection for both you and the students.
  2. Course description: Copy the course description as it is found on myHeritage. Please do not alter it without first contacting the Dean. This ensures that the course will appropriately fit into the bigger picture of Heritage’s academics.
  3. Course objectives: The objectives will list the specific learning outcomes you wish students to achieve by the end of the course. To ensure a holistic education, objectives should cover cognitive aspects of the material (knowledge-based outcomes), affective aspects (character and attitude-based outcomes), and psychomotor aspects (skills-based outcomes). Objectives should be specific and directly measurable through the assessment measures. That is, if you indicate you want students to know something, you need to clarify how you will know that they know.
  4. Course texts: The books you choose as course texts are up to you. Remember that Heritage is providing a university-level education, so texts should be sufficiently advanced, but books written at the lay level are also appropriate. Texts should be readily available, and we do try to to keep textbook costs somewhat reasonable. One very expensive text is fine, but three for one course are probably not. A textbook does not need to cover the entirety of the material of the course, but should contribute in some way to fulfilling the objectives. Readings other than textbooks are permitted, but would not be listed under textbooks unless they are resources that students are expected to procure on their own.
  5. Writing Style and Syntax: This section is standard for all syllabi.
  6. Confidentiality and Records: This section is standard for all syllabi.
  7. Course Requirements: 
    • Requirements regarding attendance, course evaluations, and library resources are standard for all syllabi. Other course requirements can be changed. If you wish to allow or disallow cell phones, tablets, laptops, eating or drinking, etc, or you have other requirements not listed, you can add them to this section of the syllabus.
    • Readings: Specify here when you expect reading to be done by (before class begins or after class), and whether or not there will be additional reading beyond that of the listed class texts. If you have additional reading, indicate approximately how many pages of additional reading students can expect.
    • Assignment submissions: Indicate here what your policy is regarding how assignments are submitted, when they are due, and any extension policy you set.  Please note that assignments submitted late without any prior extension agreements must be penalised with at least 10% reduction in the final grade per 24-hour period, but can be penalised with a reduction of up to 100% in the final grade (essentially a grade of 0 for any late assignment). In addition, you are not expected to grant extensions except in extenuating circumstances, nor do we encourage a lax policy for extensions and late submissions. Please make and follow through with the policies you set here. Assignments can be submitted by hard copy, by emailing files to the professor, or by uploading them to myHeritage. Clarify in the syllabus which you would prefer.
    • Course assignments: Here, you will outline your assessment methods. For each assessment method, you will want to specify the kind of assignment/title, its due date, its percentage of the overall mark, and a description which will help students to see how this assignment is evaluating the objectives listed earlier. A few pointers below will help in creating course assignments:
      • First-year courses (100 course codes) should rely more heavily on quizzes, tests, and exams than on research and writing. Upper classes should rely more heavily on research and writing, and may not include exams at all, unless that is deemed the most effective way of measuring the objectives.
      • No single assignment should be worth more than 40% of the final grade.
      • Assignments should be spread somewhat evenly throughout the semester so that students are able to evaluate their progress by mid-term.
      • Assignments should be weighted according to the time taken to complete them.
      • The more clarity you can provide students regarding expectations of assignments, the better students will do and the fewer questions they will ask. At minimum, specify word count and a description of the topic.
  8. Anticipated workload: This allows students to see how they should be managing their time in the course, and ensures that the course is rigourous enough without being too rigourous for a university level. Add up all the numbers. To be a suitable workload for a university-level course, you should have approximately 80 hours of work in total for the semester.
    • In the chart, under the readings, list all the reading (including texts and articles) that students will be doing, including the number of pages in each. Count on one minute per page, and figure out how many hours each reading will take.
    • Under quizzes and exams, list all quizzes and exams students will be taking, and estimate how long it will take for students to prepare for each.
    • Under assignments, list all assignments the students will be writing and provide a number of hours each will take. For writing that does not require any research, figure on approximately 30 minutes per page. For writing that does require research, figure on approximately 1-1.5 hours per page, depending on the level of research required.
  9. Level of achievement: This is standard to all syllabi.
  10. Course schedule: Students rely heavily on this section of the syllabus to keep track of what they have to do and what to expect for the class. When a topic is listed in the syllabus and that is then not covered, they struggle to follow. Remember, the syllabus is a contract between professor and student. This schedule helps students to see the coherence of the course and to be assured that objectives are being covered appropriately.
    • In the Date column, list the dates for the semester. Include dates for special events on which you may not have class, such as stat holidays, Missions’ Conference or Reading Weeks. You will find these dates on myHeritage and in the email that the administrative assistant sent to you.
    • In the Topic column, list a brief description of what will be covered in the week’s lecture. If there is no class due to a special event, write, No Class. If you have a special speaker coming in, include that.
    • In the Reading column, list what reading is due for that class. Include book title and chapter, or the title of any articles.
    • In the Assignments column, list whatever assignments are due that week. If you have an assignment that is due each week (such as a summary of reading), then list it every week.

When You’re Done

Congratulations! You wrote a syllabus! Now what?

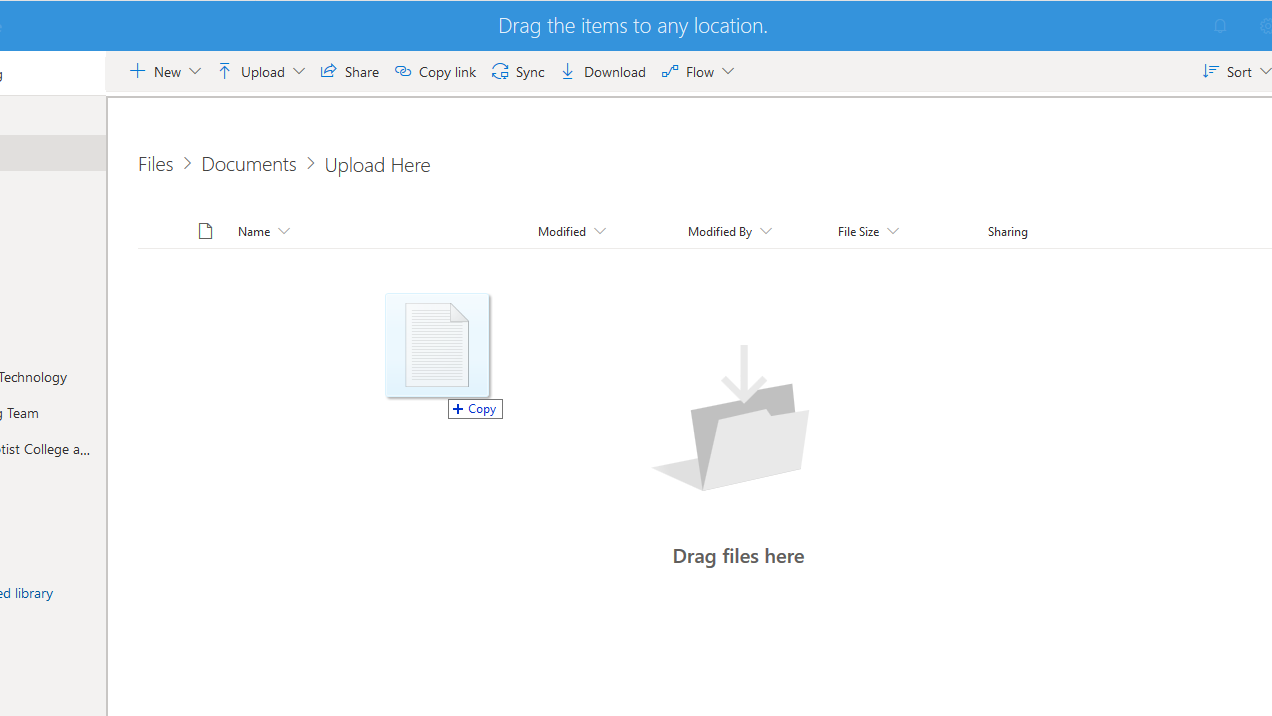
You received an email from the administrative assistant which contained a link to a Sharepoint folder. Upload your new or revised syllabus to that Sharepoint folder on or before the date syllabi are due.

From here, your syllabus will be checked to ensure that it is complete and correct.  When it is so, the updated copy will be uploaded to your course page on myHeritage. This version will become the official and binding copy of the syllabus. Your students will be able to download it and print it from there.

At the beginning of the first class, you should go over the syllabus with your class to ensure that they are familiar with it, and to give opportunity for any questions they may have.

ADP Workforce Now Login

ADP Workforce Now is our new Human Resources tool. It’ll be our go-to tool for time sheet submissions, payroll information, vacation tracking, and more. You can access ADP Workforce Now in one of two ways. Login in using your Heritage ID or an ADP Workforce Now direct account.

Login using your Heritage ID

STEP 1: Login to Office 365

Login to the Heritage Office 365 portal using your Heritage ID* at office.heritagecs.edu. A link to this portal can also be found in the Helpdesk page of our website at discoverheritage.ca/helpdesk.

* Your Heritage ID is the same account as your Heritage email account, and the same account you might use to access a Heritage provided computer.

STEP 2: Open the ADP Workforce Now app

Once you’ve logged into the Heritage Office 365 portal, click on the All Apps button in the lower left.

Scroll down and look for the ADP Workforce Now icon. It’s red with the ADP logo in the middle. Clicking the app icon will open ADP Workforce Now.

Clicking on the app icon will automatically authenticate your Heritage ID and will open the ADP Workforce Now app.

Pro Tips

ADP Workforce Now is supported in desktop versions of Edge, Firefox, Chrome, and Safari.

Once you’ve accessed ADP Workforce Now through Office 365 at least once, the ADP Workforce Now app will now be available from the Waffle menu in the top-left of Office 365.

You can save a shortcut/bookmark to ADP Workforce Now by right-clicking the icon in Office 365 -> All Apps and choosing Copy Link from the context menu. Then just create a bookmark in your browser of choice and paste the link info into it. This way, you’ll be able to login directly without having to open Office 365 first.

Setup a video call in Microsoft Teams

You can setup a video call in Microsoft Teams in a number of ways. The methods shown in the video and in the guide below will help you generate a Teams Meeting link to share with co-workers, students, or guests.

Using the Outlook App

  1. Using Outlook.  Open the Calendar and click the big New Teams Meeting button at the top in the Ribbon.  This will generate a Teams Meeting link.
  2. Give it a title, choose additional required or optional attendees and click Send.  If you’re adding other folks from Heritage, you can of course add them to the meeting.  When you click Send, they will receive a calendar invite, and the meeting will appear in their calendar and your calendar.  The meeting will also appear in the Teams app under Calendar.
  3. If you want to share the meeting link with students, simply right-click on the ‘Join Microsoft Teams Meeting’ link and choose Copy hyperlink.  Then paste that into an email to send it to your students or paste it on myHeritage in the Links section of your course under the Syllabus tab.

Using the Teams App

Meet Now

  1. In the Microsoft Teams app, open the Calendar tab (which is located on the left under the Chat tab and the Teams tab).  Click the Meet now button at the top.
  2. Give the meeting a title and click the Join now button.
  3. Open the Participants view by clicking the Show Participants button in the control bar (just to the left of the Hang up button).
  4. In participants view copy the meeting link by clicking on the Copy join info button in the top-right.  It looks like two elongated rings hooked together.
  5. Then paste that into an email to send it to your students or paste it on myHeritage in the Links section of your course under the Syllabus tab.

New Meeting

  1. Inside of Teams choose the Calendar tab and click the + New meeting button at the top.
  2. Give your meeting a title and add any required attendees.  In order to generate a meeting link, you must add at least one other person from Heritage to the meeting.
  3. Click Save.
  4. After the meeting has saved, go back into the meeting and note that the Teams Meeting link has been generated.  Copy and paste the Join Microsoft Teams Meeting link and send it to your students or post it on myHeritage.

Create a Password-Protected Document using Microsoft Word

To create a password-protected PDF document from a Microsoft Word document, follow these steps.

  1. With the Word document already open, choose Files -> Save As.
  2. In the file type drop-down choose PDF (*.pdf) as the option.
  3. Click the More options… link directly beneith the file type drop-down.
  4. In the Save as dialog that appears click the Options… button.
  5. At the very bottom of the Options dialog choose Encrypt the document with a password and click OK.
  6. Enter the password twice to confirm and choose OK.
  7. Type a File name for the PDF file and choose Save.  This action will create a password-protected PDF document in the folder you’ve selected.

Remotely accessing your computer from outside the Heritage network

There are times, where you may need to access your desktop computer from outside the Heritage network.  If you are in a role that requires you to use a desktop computer and do not have a Heritage-provided machine at home, use the steps below to create a Remote Desktop Connection to your computer in the office.

Remote Into Your Computer

First, create a VPN tunnel between your home computer and the Heritage Network.  Follow these steps to create the secure tunnel between your computer and the Heritage network BEFORE you attempt to open a Remote Desktop Connection.  The VPN connection will automatically time out after a while, so you will need to reconnect it each time you want to remotely access your computer.

Second, use Remote Desktop to access your computer using the instructions below.

Use Remote Desktop to connect to your computer – Windows 10

  1. Open Remote Desktop Connection.  Open the Start menu and search for “Remote Desktop Connection” (the word remote will typically suffice).  Open the app.  Then click Show Options.
  2. In the Computer field type the full name of the computer you want to connect to.  The full name of your computer is the name of your computer followed by heritagecollege.local.  For example, if Stu Pendous was trying to connect to his computer the full name would be
    spendous12b.heritagecollege.local

    To find out the name of your computer, please send a message to helpdesk@heritagecs.edu.

  3. In the User name field type in your fully qualified username, which in most cases will be your email address (the fully qualified user name for Stu Pendous would be spendous@heritagecs.edu). Press Connect or hit ENTER.  The connection will be established, this may take a moment.
  4. Enter your Heritage password.
  5. Confirm the security certificate by checking the checkbox and clicking Yes. This certificate is issued by the remote computer which is managed by the IT department at Heritage. The name in the certificate issued by the remote computer will be the name of the computer you’re connecting to.
  6. Once you press Yes in previous dialog, you should be logged in to your desktop computer that is on the Heritage network.  From there you can operate the computer as if you were sitting in front of it and you will have access to all the same resources.

Use Remote Desktop to connect to your computer – iOS and iPad OS

This tutorial will satisfy the need of users on the iPhone, iPad, and iPod Touch devices.  It was tested on iOS 11 but the methodology is the same even on older versions of iOS and iPad OS.

  1. Download and install the Microsoft Remote Desktop app from the iOS App Store.
  2. Open the newly installed app (it may appear as RD Client on your homescreen).
  3. In the Remote Desktop app press the + (plus) button in the top right.  Choose Desktop from the list of choices.
  4. In the Desktop dialog enter the following settings.
    1. In the PC Name type the full name of the computer you want to connect to.  The full name of your computer is the hostname followed by heritagecollege.local.  For example, if Stu Pendous was trying to connect to his computer the full name might be
      spendous12b.heritagecollege.local

      To find out the name of your computer, please send a message to helpdesk@heritagecs.edu.

    2. In the User Account field you can choose to enter your account information every time or to save it.  Please keep in mind who might have access to your iOS device and use that information to make a wise choice about saving your account information or not.  You will need to enter your full User Name and your Password.  For example, the User Name for Stu Pendous would be spendous@heritagecs.edu).
    3. Click Save.  This will save the remote desktop profile so can easily reuse it.
  5. Once the profile is saved simply touch on the profile to launch the remote session and access the remote computer.

Use Remote Desktop to connect to your computer – MacOS

These settings for iOS and iPad OS will also work for MacOS.  Simply install Microsoft Remote Desktop from the App Store, Add a PC configuration using the following settings, and connect.

  • PC name: The name of your desktop computer such as spendous12b.heritagecs.edu
  • User account: Use your Heritage email address and password
  • Click the Add button

Other Options

Others options to be aware of are things like copying files between your computer and the remote computer, or sharing audio or multiple displays.  To get to options click the small Show Options drop-down in the Remote Desktop Connection window.  Doing this will make five tabs appear along the top edge.  General, Display, Local Resources, Experience, and Advanced.

  • On the Display tab there are options for telling Remote Desktop how to handle multiple displays if you have multiple monitors plugged into the computer you are using to remotely access your computer at work.  You can also choose quality settings specifically.
  • The Local Resources tab is where you can affects settings related to the sharing of audio, printers, and the clipboard.  By default, the Clipboard is shared between your computer and the remote computer.  This enables you to copy and paste text between computer, and it will also allow you to copy files and folders between your computer and the remote computer (very handy).  Please note that sharing large files between computer could take a long time depending on the size of the file and the speed of your internet connection.
  • By default, audio is shared between computer, if you want to disable this go to the Local Resources tab and click on the Settings… button under Remote audio.  In the dialog box that appears choose Do not play under the Remote audio playback section and click OK.

Connecting to the Heritage Network using a VPN

VPN stands for Virtual Private Network.  In this tutorial we will discuss how to create a VPN connection to the Heritage network when you are off campus.  This can be useful if you want to access resources that are only available on-site such as the file server or a desktop computer.  Establishing a VPN connection between your computer and Heritage will create a secure tunnel where data can flow securely between your computer and the Heritage network.

Creating a VPN Connection

Windows 10

  1. Open the Start menu and choose Settings.  Look for and open Network & Internet
  2. From the Network & Internet sub-menu, choose VPN
  3. Click Add a VPN connection
  4. In the VPN Provider field choose Windows (built-in)
  5. In the Connection name field type a friendly name such as Heritage VPN
  6. In Server name or address field type
    vpn.heritagecs.edu
  7. In the VPN type field choose L2TP/IPsec with pre-shared key
  8. Enter the Pre-shared key into the Pre-shared key field.  The Pre-shared key can be found in the Heritage VPN Access email sent by a Heritage IT Admin.
  9. In the Username field type your full Heritage Username – this is likely your email address (such as anitaminute@heritagecs.edu).
  10. Type your Heritage Password into the Password field.
  11. Click Save to save the settings.
  12. The VPN connection is now configured.  To establish a VPN connection between your computer and Heritage simply choose the new connection and press Connect.

You can also access this connection extremely easily from the network icon in the Taskbar.  In the lower-right corner of the Taskbar, look for the network icon (it could be a wireless icon if you’re on Wi-Fi or a little Monitor-with-network-cable icon if you’re using a wired connection).  Click the icon.  If you completed the steps above to create a VPN connection, the new connection will be available from this menu.  Just click it a choose Connect.

iOS

Creating a VPN connection profile is easy to do on iOS and provide a secure tunnel from your device into the Heritage network.

  1. Open  the Settings app.
  2. Go to General -> VPN.  You’ll need to scroll down as its near the bottom.
  3. Choose Add VPN Configuration…
  4. In the Add Configuration screen for Type choose L2TP
  5. In the Description field type a friendly name such as Heritage VPN
  6. In Server field type
    vpn.heritagecs.edu
  7. In the Account field type your Heritage Username – this is likely your email
  8. Type your Heritage Password into the Password field.
  9. In the Secret field, very carefully, type in the Secret code.  Contact the IT department for this code.
  10. Choose Done at the top right.
  11. The VPN connection is now configured and you will move back to the VPN screen.  To test the connection click the slider to the right of Status.  The connection will be established and the status will change to say Connected.

Additionally, now that the VPN settings are configured you can turn the connection on and off easily from the main Settings App screen.  A new entry called VPN will have appeared near the top.

MacOS

Creating a VPN connection profile is easy to do on iOS and provide a secure tunnel from your device into the Heritage network.

  1. Open  the System Preferences app
  2. Go to Network.  Click the + (plus) button in the lower left-hand corner of the Network window to add a new connection
  3. In the Interface drop-down choose VPN
  4. In the VPN Type drop-down L2TP over IPSec
  5. In the Service Name field type a friendly name such as Heritage VPN.  Click Create
  6. In Server Address field type
    vpn.heritagecs.edu
  7. In the Account Name field type your Heritage Username – this is likely your email
  8. Click the Authentication Settings button.  Type your Heritage Password into the Password field
  9. In the Shared Secret field, very carefully, type in the Secret code.  Contact the IT department for this code.  Click OK
  10. Choose Apply in the bottom right
  11. The VPN connection is now configured.  To initiate the connection between your Mac and the Heritage campus click the Connect button.  You may also choose to enable the Show VPN status in the menu bar to provide a quick and easy place to initiate the connection.  With this enabled, you can simply click Connect Heritage VPN to make the connection.

Other Awesome Stuff

Now that you’ve established a VPN connection you can do awesome stuff like remotely access your desktop computer as if you were sitting in the office at Heritage.

If you have a Heritage-deployed laptop, after establishing the VPN connection, you should be able to access your Home drive and the Staff drive like you normally would by going through File Explorer and opening those drives.  Please note that opening those network locations will be slower over the VPN connection than when you are physically on-site.

Getting started with Microsoft OneDrive

First off, what is OneDrive?

OneDrive is a cloud based program, hosted by Microsoft. It is apart of our Office 365 subscription and is therefore easily able to integrate into our workflows.

How to Upload Your Files onto OneDrive for Work at Home

With the current state of health in the world, we all must proceed forward in a manner that allows us to access tools and files and produce work from home. OneDrive is going to be a key component in allowing us to do so. Whether accessing OneDrive from your browser or from an app downloaded on your device, you now have the freedom to transfer and access work files simply over OneDrive. This will grant you access to these files from virtually anywhere and thus alleviate the necessity for coming in to work. This article will cover the two ways of doing that, through the app and/or through your web browser.

How to Access OneDrive in the Cloud

Because OneDrive is cloud-based, files and folders stored there can be accessed from almost any device with a modern web browser.  All modern web browsers including Google Chrome, Mozilla Firefox, Microsoft Edge, Apple Safari, and many more can be used to login to and access files stored in OneDrive.

To access OneDrive navigate to http://office.heritagecs.edu and login with your Heritage email address and password.  After logging in click on the OneDrive icon in the Good morning section.

(click the image to see a larger version)

Create new files and folders

  • To create a folder, click the + New button in the border located at the top of the page.  Then click Folder.
  • Once you create and name your folder/s you can then upload files onto them from your computer.
  • To do this, simply drag and drop a file from your computer onto the main area in the browser.  The file will be uploading into that folder.

(click the images to see a larger version)

Share a files and folders

  • To share a folder, hover your mouse over it and a translucent circular button will appear to the left, click it and a blue check mark will appear inside.
  • From there, direct your attention back up to the border where you previously selected “+ New” you will see a “Share” option in its place.  the Sharing menu will pop open.
  • Select “anyone with the link can edit” and write down the name of the staff and/or faculty member that you would like to share the contents of that folder with.
  • You can send an email directly to the person you’d like to share with by entering their email address and clicking Send.
  • Or, you can click the Copy Link button and paste the link into an email, or use it elsewhere.

How to Use the OneDrive App

An alternate way to access the uses of OneDrive is to download the OneDrive app onto your computer. For Windows10 users, it should be on your computer already. If not, you can find the download link for OneDrive by locating the “Get the OneDrive Apps” link by logging in to OneDrive using your browser.  Again, the link to OneDrive is http://office.heritagecs.edu

  • Once on your computer, open the app and it will ask you for your email.  Search for it in the start menu if needed.
  • Use your corporate Heritage email address and proceed to login.
  • From there, OneDrive will go over the process for you and explain how to use the app.  Make note of the location of the OneDrive folder, and some new icons for the status of files.
  • OneDrive will sync any files and folders you add into the OneDrive folder on your computer to the cloud.  These files  and folders will be accessible across all devices because including the app on your phone and in the browser.
  • If you wish to share files simply folder the instructions above on sharing files and folders.  Alternatively, simply right-click on a file and choose ‘Share’.  This will give you a dialog similar to the online version of the sharing menu.

How to Bookmark your Bookmarks

Have you ever tried to open up your saved bookmarks on your browser after an event takes place, such as a power outage, and were shocked to find that they’re not there? Your bookmarks to sites and articles, what you rely on to safely navigate through your day to day work items, are no longer at the ease of your fingertips. If only there were a way to keep those bookmarks saved for good, similar to how you wish you could save the sites you search up, which is the very reason bookmarks were created. If only there were a way that we could bookmark our bookmarks.

Well, luckily there is (so-to-speak). For free! All that’s required is to create an account on either Google Chrome or Mozilla Firefox. Unfortunately, this means there is the added annoyance of, yet again, having to create an online account and password; but thanks to your integration of Enpass or LastPass this will no longer pose an annoyance or deterrent to adding another online account. Thank goodness someone has already covered this dilemma previously. All you have to do is choose your favorite, and most frequented, web browser (typically Google Chrome or Mozilla Firefox) and create an account. Once you have an account, you can save all of your tabs to that account and cross-integrate those saved items to any device that you open up on the browser you have chosen (after logging into your account). Not only does this save you from losing these bookmarks when your computer goes down, or when a power outage wipes your bookmarks, but it also allows you to link up your work bookmarks with your home bookmarks as well. You, of course, have freedom in your account as to what you want linked up across devices when you login to your account on multiple outlets. So if you don’t want your browser history linked, for example, but you want your bookmarks linked then you are now able to have that option.

This is revelatory and triumphant news, for those of us that have gone through the annoyance of losing all our cached items in our web browser after an unexpected power outage or computer failure. I know it’s a question that often gets posed after a power outage, “where did all my bookmarks go?” and this is an article to answer any future questions on the topic. Down below I’ve provided some links to the Google Chrome and Mozilla Firefox account creation page. Follow the links and quickly create an account to avoid future issues with lost and non-malleable bookmark integration. Quick Note: If you have a Google account for things such as Gmail then you already have an account for accessing your saved bookmarks on Chrome. All you have to do now is login to your Google account and save your bookmarks to your account so that when you login to Chrome on another device it integrates those saved bookmarks.

Google:

https://accounts.google.com/signup/v2

Firefox:

https://support.mozilla.org/en-US/kb/access-mozilla-services-firefox-account

Hope this helps with any confusion about lost bookmarks, both now and in the future.


Passwords that Pass Along (Permeant Passwords)

Do you keep the same password for every major site you frequently visit? Perhaps you have a set of 2, 3, or possibly 5 different passwords that you like to cycle through as viable options for your accounts.

The world that we live in today demands us to have passwords for every single account we make and that, for maximum security, those passwords are complex, unique and untraceable. However, it’s not a natural thing for humans to do: remembering highly complex random combination sequences of letters and numbers.

So, that’s why there are companies that have capitalized on that dilemma and provided an opportunity for you to sync all of your passwords to one account and manage the rest of your account logins from there. You can go back to remembering one password: the one that gets you into this third party program. From there, it will autogenerate random sequences of numbers and letters for your synced accounts so that you don’t have to. Then, when you go to access that account, you simply circle back to this third party program and access your information.

A reliable company that does this is Enpass and I’ve provided a link to their site for you to check out here:

https://www.enpass.io/

Their desktop version is free, and their mobile app (which syncs to your desktop version) has a free lite option (capable of saving 25 password accounts). If you’re interested in saving more than 25 account passwords then there’s a full mobile version available for $6 a year (monthly basis of $0.49 a month) OR a one cost buy in of $39.99 if you expect to use it for more than 6 years.

Another reliable company to check out for essentially the same features, is LastPass. Their link is located here:

https://www.lastpass.com/how-lastpass-works

LastPass has a slight variant from Enpass, in that it works through your browser. It has an app function as well that links to your main account but on your desktop it is operated as a browser tab extension. The pricing for it breaks down similarly to Enpass, except that it lacks the one cost option. The only option is on a monthly basis; but it does offer a family plan for you and your members that includes up to 6 users for only $1.35 extra a month. Overall, it is a more pricey option than Enpass: $4.01/month for Premium and $5.35/month for families. So, it’s a significant jump in price when compared to Enpass, but it does offer the ability to link up multiple users under one umbrella and sounds like it has an easier time transferring your passwords through to the integration process of logging into accounts. So if the price jump is worth it for the easier access and joint users, then the LastPass option makes more sense.

If you have an Apple product at home and at work then another option to use would be Apple Keychain. Unfortunately, most of us at work have Windows devices for our operations within the school. That means that for the majority of us, this isn’t an option. However, if you’re able to operate solely on Mac devices in your life then Apple Keychain is another option that also happens to be free. Here is a link to help you understand more about Apple Keychain, if that is an avenue that you wish to go down for at least your personal items at home:

https://support.apple.com/en-ca/guide/keychain-access/kyca1083/mac

These are just some things to consider as an alternative to using the same passwords over and over again for different accounts and risking a hacker gaining access to all your accounts through the cracking of one password. The world we live in expects us to be robots that can generate random passwords out of thin air and then remember each individual one indefinitely, regardless of how infrequent the use of it is. I’m simply suggesting a solution that doesn’t tax your memory with useless information, while still maintaining your account security, so that you can focus on the more important things.


Welcome to Heritage College and Seminary

Hey there, welcome aboard!  As you already know, we’re pretty excited to have you join the team here at Heritage.  And we have high hopes about your partnership in our continuing mission to equip men and women for life and ministry.  Here are a few things that will help you get started.

Accounts

You have a Heritage ID account and a myHeritage account.  They are two different things.  I know, we were very original about the naming of these accounts.

  • Heritage ID – This is the account that is tied to your email and will grant you access to most computers on campus.  It is made up of the username/email and password that you were given by your manager when you started.  It will also grant you access to a number of systems; office computers, your email, Microsoft Office 365, Microsoft OneDrive, Microsoft Teams, printers, ADP Workforce Now, etc.
  • myHeritage account – myHeritage (the developer is Populi) is the system that keeps track of our student records, handles course and program details, manages student billing and donations, and is also a learning management system.

Wireless Access

There are two wireless networks available on-campus.  The first is a public access network for use by our students and guests for general access to the internet.  The second is our secured network for use by our staff and faculty that provides direct access to our server infrastructure and faster upload speeds.  Details are below.

  • Name: Heritage. Open network, needs no password.
  • Name: Heritage Staff. Closed network.  See the IT Manager for access.

Other Apps & Tools

  • Office 365 is a set of cloud-based apps and tools that enable us to communicate, write, organize, and manage.  Login to Office 365 by using the URL office.heritagecs.edu.
  • Microsoft OneDrive is personal cloud storage that’s included as an App within your school Office 365.  Navigate to office.heritagecs.edu and login with your Heritage ID.  OneDrive provides you with 1TB of cloud storage and can be setup to synchronize files between your computer and the cloud.
  • Microsoft Teams is an excellent video conference and collaboration solution.  We use Microsoft Teams for inter-office chat and team collaboration on projects.  We also use Teams as a video conference tools for meetings and to delivery our live streaming courses.  There are Windows 10, MacOS, iOS and Android apps for both OneDrive and Teams.  You can access Teams directly from teams.microsoft.com or by logging into Office 365 (above) and clicking the Teams icon.
  • Your Home drive.  When you login to a Windows-based computer, your home drive will automatically mount.  The H: drive is a spot on the server where you can store your own personal files that only you have access to.  In some cases, the primary Documents, Desktop, Photos, etc. directories point to these same folders on the server.  Access to your Home drive can be setup for MacOS users with a quick trip to see the IT Manager.
  • File storage and collaboration is handled by our file servers.  One of the main locations for this is the Staff Drive, which will be mounted automatically when you log in to a Windows-based computer.  For Mac users, please see the IT Manager to get set up.
  • Heritage VPN – this tools provides a way to connect back to the Heritage campus network when you’re off-site.  If you have a Heritage laptop, chances are the VPN configuration is already complete.  All you need to do connect using your Heritage ID.  Feel free to check out the article on Connecting to the Heritage Network using a VPN for more details.

If you need tech support, please email rshouldice@heritagecs.edu or message me on Microsoft Teams.

Our Website (Outlook & Helpdesk)

There are a few easter eggs on our website that act as quick links to important locations.  So, head over to discoverheritage.ca and check out these links.

  • Outlook & Helpdesk – links to these two locations can be found in the footer of the website.  Just head to discoverheritage.ca and scroll all the way to the bottom.  Outlook is a web-based version of Outlook where you can access your Heritage email.  Helpdesk is a page that provides a useful jumping off point to the most important Apps & Tools, including to this Helpdesk site (Salo).
  • myHeritage, Moodle, and Live –  These three links live in the header of every page.  They are located there because they are the most high traffic and timely links that folks look for.

Articles

These are useful articles on how to add an email account to a Smartphone (if desired) and how to connect to a printer from any of the Windows 10 workstations.  MacOS users, please see the IT Manager.