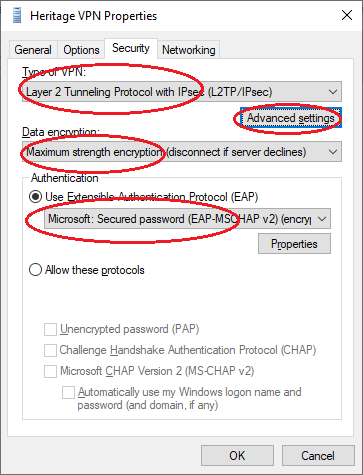
Heritage requires all professors to take weekly attendance for their classes. In the past, this was done by filling out weekly attendance sheets and submitting them to the office. Now, attendance will be taken through myHeritage, enabling students to keep careful track of their own attendance, and making the information instantly available to all who require it. Heritage is required by law to keep accurate and up-to-date attendance records so that we can provide OSAP funding, so we appreciate your diligence in this matter.
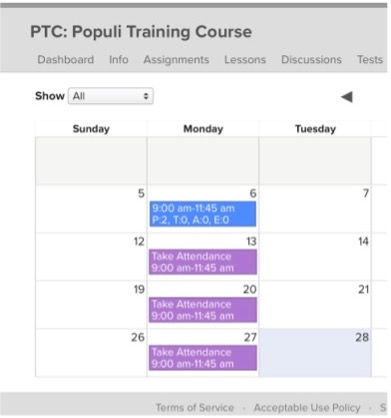
Click on the “Attendance” tab. A calendar like this one will open up.

You will notice that your class times are all listed. When you click on the class for that day, you will get an attendance list for your class roster.

MyHeritage automatically sets attendance to “Present”. If your whole class was present, click “Save Attendance”, and you’re done. Otherwise, find those students who were not present and select “Absent”. Be sure to take attendance for both Section 1 and 23 students by toggling the section drop-down menu in the upper right corner of the page.
If you have a student who is normally in class, but was present online instead (or vice versa) you can mark that student as present and make note of the online status in the notes box beside the student’s name. Please note that although there is a category for Tardy, Heritage does not collect that information. Students must be marked as either present or absent. If students are substantially late, or if they are present for only part of the class, you can make note of that in the “notes” section of the attendance page.
When you have saved attendance for that class, you will notice on the calendar that the class changes colour. You can see at a glance which classes you have taken attendance for.
Attendance records for each student are instantly updated, and students can quickly check their attendance records for each class. In addition, frequent or repeated absences will be quickly flagged and faculty advisors will be notified for early intervention.