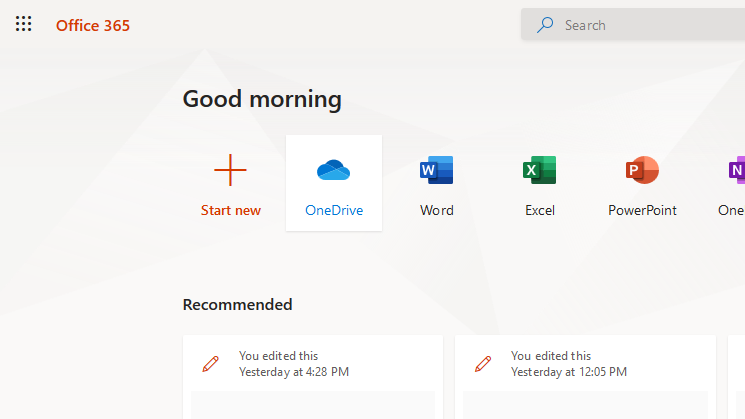
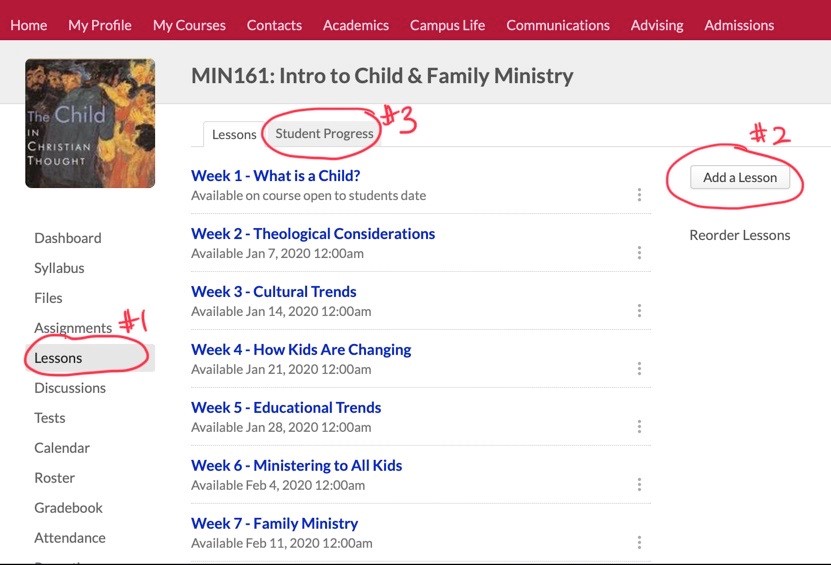
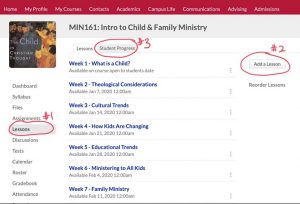
Log on to your course page on myHeritage. This is the same place you take attendance and enter grades. Along the left side is a column reading Dashboard, Syllabus, Files, Assignments, Lessons, Discussions, Tests, Calendar, Gradebook, etc. (See #1 in photo below.)
Create A Lesson
(all photos are from Marianne’s Intro to Children’s Ministry class)
- Click on the Lesson tab. You will see this (click image for large version):
(click image to enlarge)
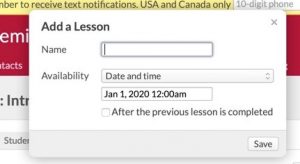
- Click on the Add a Lesson tab. (See #2 in the photo above.)
(click image to enlarge)
- Give the lesson a title and set the date and time it will be available (generally the time your class would normally start). If you click “after the previous lesson is completed”, that will override any date and time you make the lesson available. I usually leave it unchecked.
- Add one lesson for each class you have left in your semester. You will see them appear as a list, as you can see in the first photo.
- To give your lesson content, click on one of the lessons you have just created. It will open up to two tabs, as seen below:
(click image to enlarge)
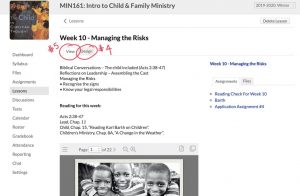
My lesson already has content. Yours will be blank. The “view” tab (#5) is how the lesson will look to your students. The “design” tab (#4) is where you will add the content. Click it. Photo is on the next page. I don’t have time for fancy formatting!
(click image to enlarge)
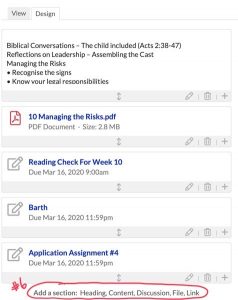 Again, my lesson already has some content. But you will see the line at the bottom, #6.
A heading is just that. A text box will open up and you can type directly in it, and on the view tab, you’ll have a nice, bold heading.
Content is like what you see at the top of my lesson to the left. Again, a text box will open up. You can type in it directly to give the students directions, information, whatever. I think you can even add photos to that content. The text is fully formattable. (You can underline, highlight, use italics, bold, etc.)
Discussions allow you to post a topic and have students interact with that topic and with each other. I’ll talk more about that below.
Files are your Powerpoint slides (I always save them to PDF and upload the PDF) and your audio or video files. I’ll talk about that more below.
Link allows you post a link to a website or YouTube video. More below.
Lesson Content Types
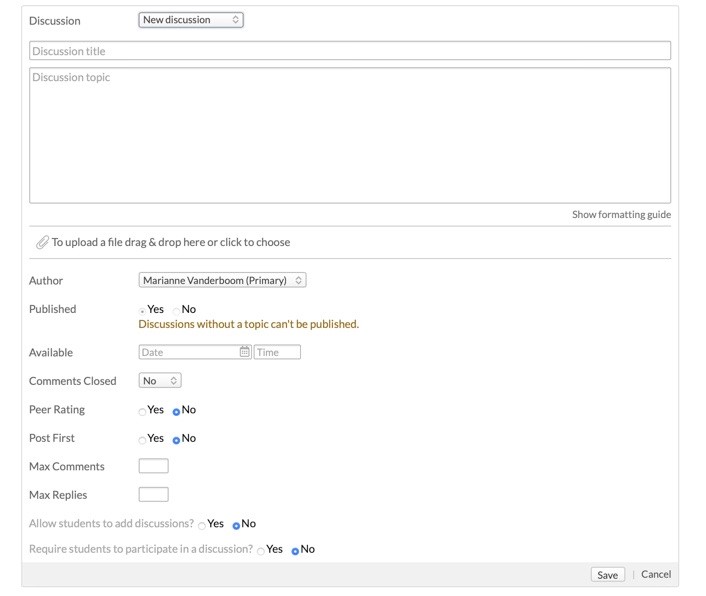
Discussions
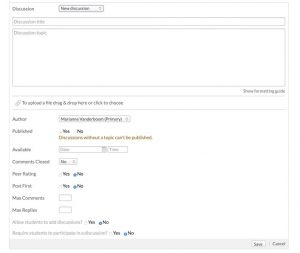 Discussions are helpful ways to get students to interact with the material and each other in lieu of face-to-face interaction. Add a discussion and this box will open up. Give your discussion a catchy title, and then in the topic box create something for students to talk about. You can also drag and drop files or photos for students to interact with.
- Beside Published, click yes.
- Beside available, click the date of your class.
- Beside Comments closed, click no.
Peer rating means that students can evaluate their peers’ comments. I don’t find it helpful, but to each his or her own.
Post first means that students must first reply themselves to the topic posted before they can see their peers’ posts. This is helpful to ensure originality of ideas.
Max comments and max replies are helpful if you have a student who posts dozens of times. As if. I usually leave these blank.
Allow students to add to the discussion: I usually click no. Probably because I’m a control freak. Mostly because I don’t know what it means. It’s never hindered my discussions online.
Require students to participate in the discussion. It is important that you click “yes” for this. It is the only way we can track participation for attendance.
Files
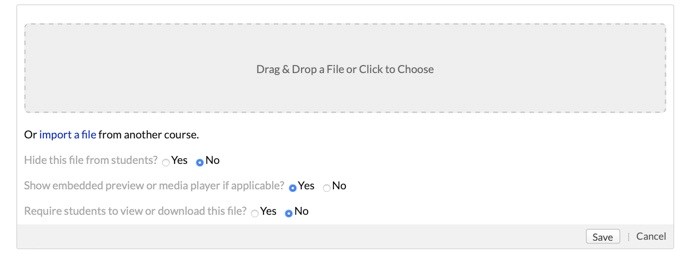
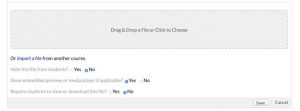 This is what you will use to upload lecture notes (Powerpoint) and audio or video recordings.
I always save my Powerpoint slides as a PDF and upload the PDF.
Drag and drop the files you want to upload.
Hide file from students: No. What would be the point?
Show embedded preview player: Yes. This allows the students easy access to the files.
Require students to view or download? Yes. Again, it is how we will measure lesson completion for attendance records.
Links
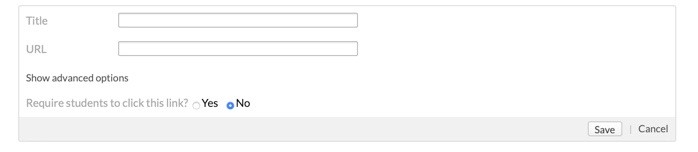
 If you add a link, this box will open. You can give the link a title, and then copy and paste the URL (website). The students will see the title as a hyperlink.
Again, if you use a link, require the students to click it for attendance purposes.
Conclusion
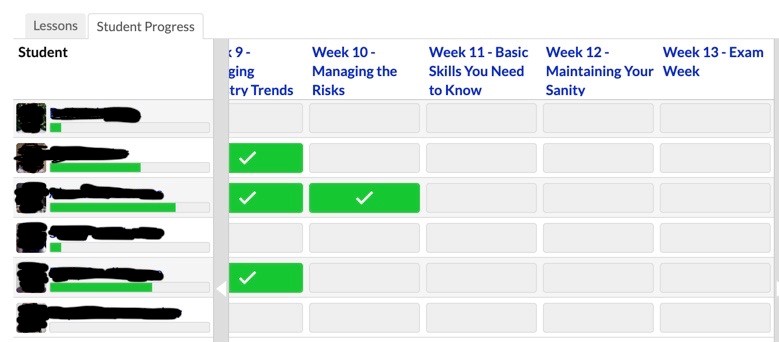
Ok, that’s your lesson. Now go back to the very first photo, and have a look at #3. If you click on that, you will see a graph that looks like this:
(click image to enlarge)

Each lesson will have a status bar showing how much of the lesson has been completed (if you’ve required all the elements to be done). If the student has completed the whole lesson, you can then mark that student as “present” in the attendance tab. If a student has not completed the lesson (or hasn’t completed enough of the lesson), you can mark that student as absent. You may notice that myHeritage now has a “notes” section beside each student’s name on the attendance roster. If a student is finished part but not all of the lesson, you could mark that student present and make a note of how much of the lesson was complete. If the student then has another lesson that is only partly completed, you could make that note and mark the student as absent the second time.