There are times, where you may need to access your desktop computer from outside the Heritage network. If you are in a role that requires you to use a desktop computer and do not have a Heritage-provided machine at home, use the steps below to create a Remote Desktop Connection to your computer in the office.
Remote Into Your Computer
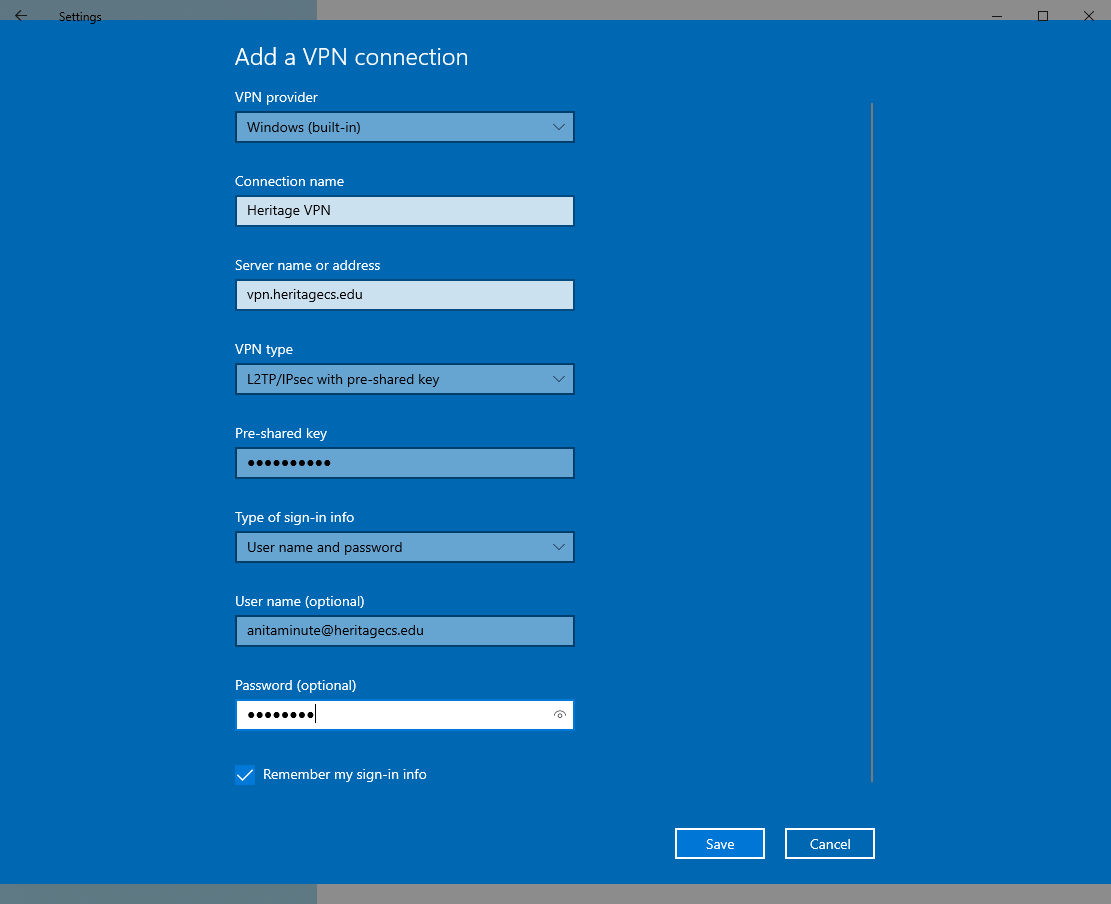
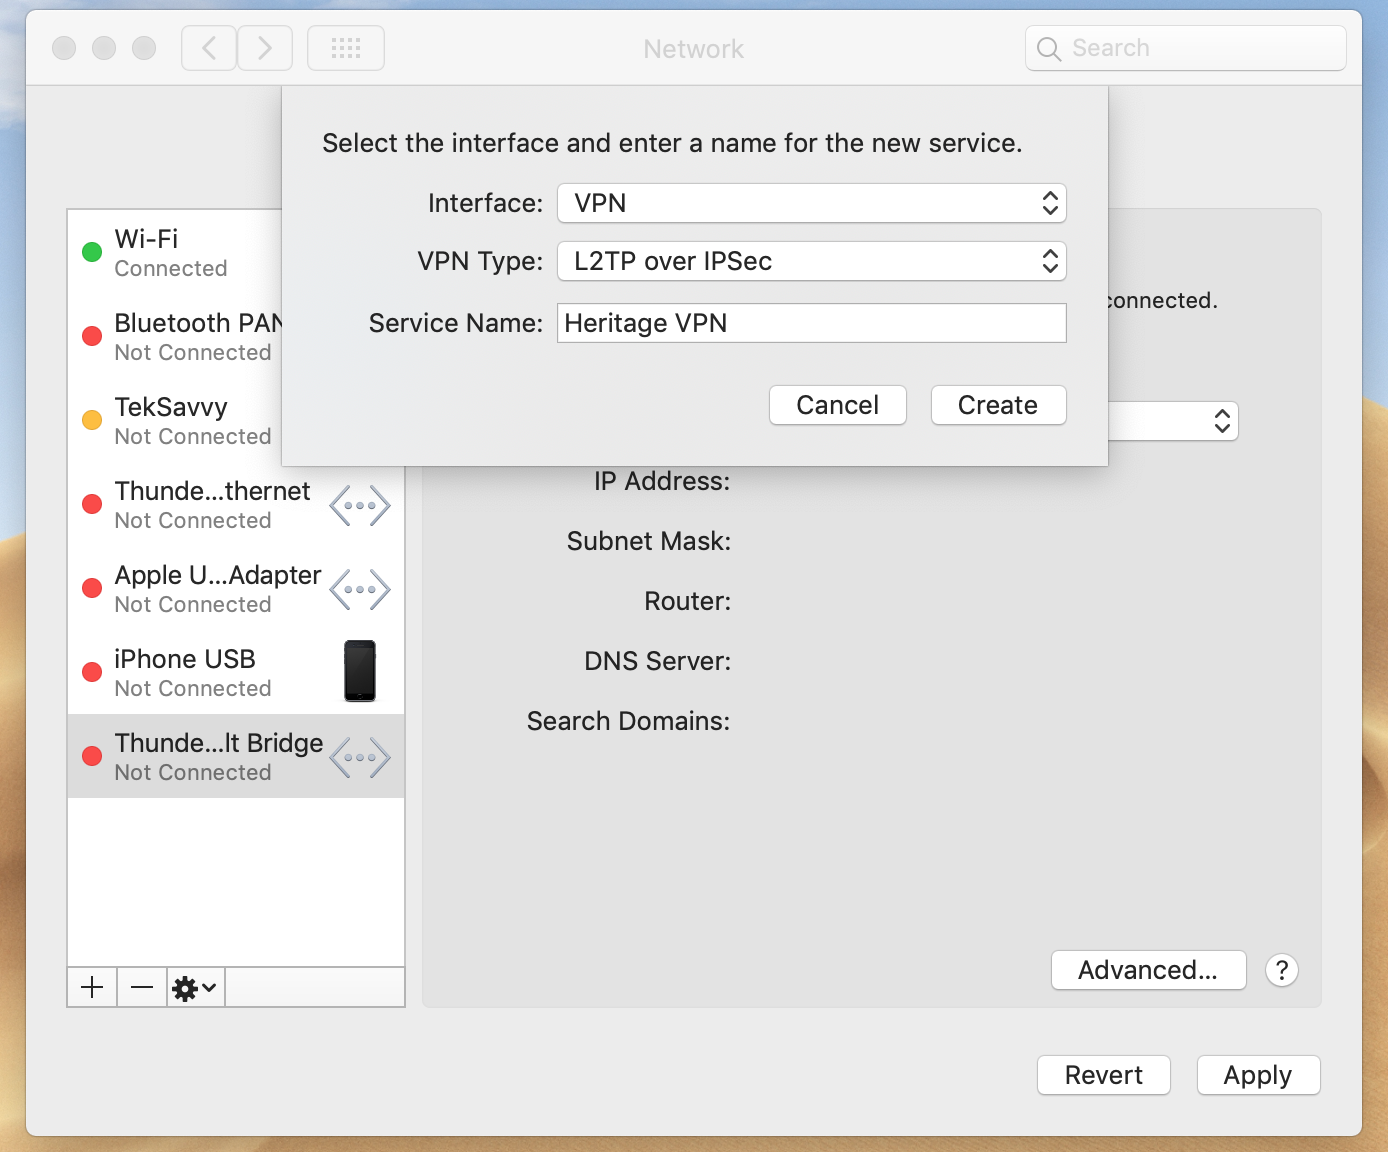
First, create a VPN tunnel between your home computer and the Heritage Network. Follow these steps to create the secure tunnel between your computer and the Heritage network BEFORE you attempt to open a Remote Desktop Connection. The VPN connection will automatically time out after a while, so you will need to reconnect it each time you want to remotely access your computer.
Second, use Remote Desktop to access your computer using the instructions below.
Use Remote Desktop to connect to your computer – Windows 10
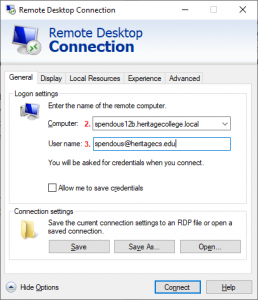
- Open Remote Desktop Connection. Open the Start menu and search for “Remote Desktop Connection” (the word remote will typically suffice). Open the app. Then click Show Options.

- In the Computer field type the full name of the computer you want to connect to. The full name of your computer is the name of your computer followed by heritagecollege.local. For example, if Stu Pendous was trying to connect to his computer the full name would be
spendous12b.heritagecollege.local
To find out the name of your computer, please send a message to helpdesk@heritagecs.edu.
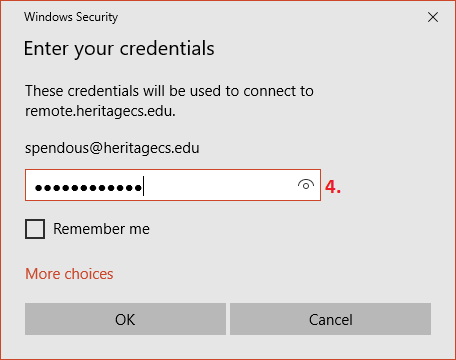
- In the User name field type in your fully qualified username, which in most cases will be your email address (the fully qualified user name for Stu Pendous would be spendous@heritagecs.edu). Press Connect or hit ENTER. The connection will be established, this may take a moment.
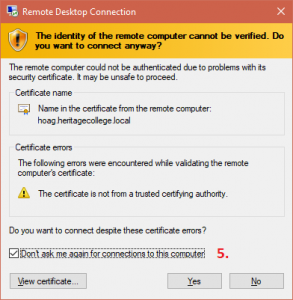
- Enter your Heritage password.

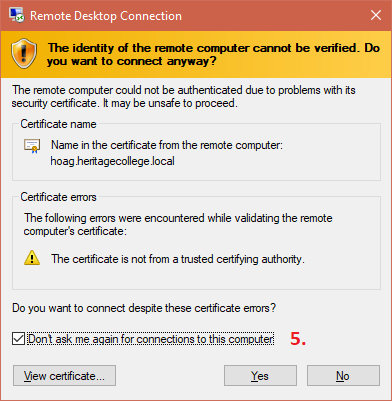
- Confirm the security certificate by checking the checkbox and clicking Yes. This certificate is issued by the remote computer which is managed by the IT department at Heritage. The name in the certificate issued by the remote computer will be the name of the computer you’re connecting to.
- Once you press Yes in previous dialog, you should be logged in to your desktop computer that is on the Heritage network. From there you can operate the computer as if you were sitting in front of it and you will have access to all the same resources.


Use Remote Desktop to connect to your computer – iOS and iPad OS
This tutorial will satisfy the need of users on the iPhone, iPad, and iPod Touch devices. It was tested on iOS 11 but the methodology is the same even on older versions of iOS and iPad OS.
- Download and install the Microsoft Remote Desktop app from the iOS App Store.
- Open the newly installed app (it may appear as RD Client on your homescreen).
- In the Remote Desktop app press the + (plus) button in the top right. Choose Desktop from the list of choices.
- In the Desktop dialog enter the following settings.
- In the PC Name type the full name of the computer you want to connect to. The full name of your computer is the hostname followed by heritagecollege.local. For example, if Stu Pendous was trying to connect to his computer the full name might be
spendous12b.heritagecollege.local
To find out the name of your computer, please send a message to helpdesk@heritagecs.edu.
- In the User Account field you can choose to enter your account information every time or to save it. Please keep in mind who might have access to your iOS device and use that information to make a wise choice about saving your account information or not. You will need to enter your full User Name and your Password. For example, the User Name for Stu Pendous would be spendous@heritagecs.edu).
- Click Save. This will save the remote desktop profile so can easily reuse it.
- In the PC Name type the full name of the computer you want to connect to. The full name of your computer is the hostname followed by heritagecollege.local. For example, if Stu Pendous was trying to connect to his computer the full name might be
- Once the profile is saved simply touch on the profile to launch the remote session and access the remote computer.


Use Remote Desktop to connect to your computer – MacOS
These settings for iOS and iPad OS will also work for MacOS. Simply install Microsoft Remote Desktop from the App Store, Add a PC configuration using the following settings, and connect.
- PC name: The name of your desktop computer such as spendous12b.heritagecs.edu
- User account: Use your Heritage email address and password
- Click the Add button
Other Options
Others options to be aware of are things like copying files between your computer and the remote computer, or sharing audio or multiple displays. To get to options click the small Show Options drop-down in the Remote Desktop Connection window. Doing this will make five tabs appear along the top edge. General, Display, Local Resources, Experience, and Advanced.
- On the Display tab there are options for telling Remote Desktop how to handle multiple displays if you have multiple monitors plugged into the computer you are using to remotely access your computer at work. You can also choose quality settings specifically.
- The Local Resources tab is where you can affects settings related to the sharing of audio, printers, and the clipboard. By default, the Clipboard is shared between your computer and the remote computer. This enables you to copy and paste text between computer, and it will also allow you to copy files and folders between your computer and the remote computer (very handy). Please note that sharing large files between computer could take a long time depending on the size of the file and the speed of your internet connection.
- By default, audio is shared between computer, if you want to disable this go to the Local Resources tab and click on the Settings… button under Remote audio. In the dialog box that appears choose Do not play under the Remote audio playback section and click OK.