Welcome to Heritage

An Orientation Guide for Adjuncts and New Faculty

We are genuinely delighted that you have decided to join the team. You play an important role in helping us to fulfil our mission to provide an evangelical, faith-based, university-level education to equip men and women for life and service in the church, community, and the world. This brief welcome document aims to provide you with the information you need to begin your role at Heritage.

Timelines

Because our students register early for courses, our timelines to prepare for the next semester run early. As you prepare for the term, please be aware of these important events:

  1. Choosing course textbooks. You will receive an email quite early (generally in early February for Fall term courses, and in early October for Winter term courses). Please have your textbook selections done by this time so that texts can be ordered in time to stock them in the bookstore for the upcoming semester.
  2. Writing your syllabus. Syllabi are due six weeks before the term begins. Fall syllabi will be due in early August, and Winter syllabi will be due in late November or early December. You will receive an email to remind you of these dates, and an email with a link where your syllabi can be uploaded. Instructions on writing syllabi will be provided in the first email you receive.
  3. Setting up your course on myHeritage. At some point before the beginning of the term, you will be required to familiarise yourself with myHeritage and set up your gradebook there. There are guides you can work through here.

Finding Your Way Around
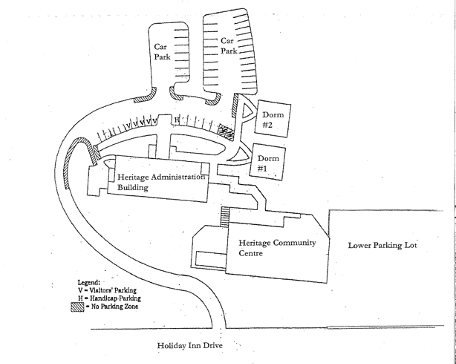
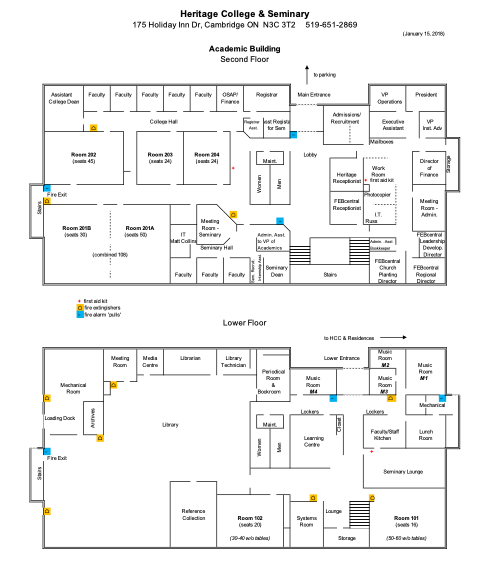
Parking is available at the top of the hill behind the Academic Building. Parking is free at Heritage.

The Academic Building contains classrooms, faculty offices, and the library. There is also a staff lunchroom with a fridge, stove, and microwave as well as coffee available to staff and faculty.

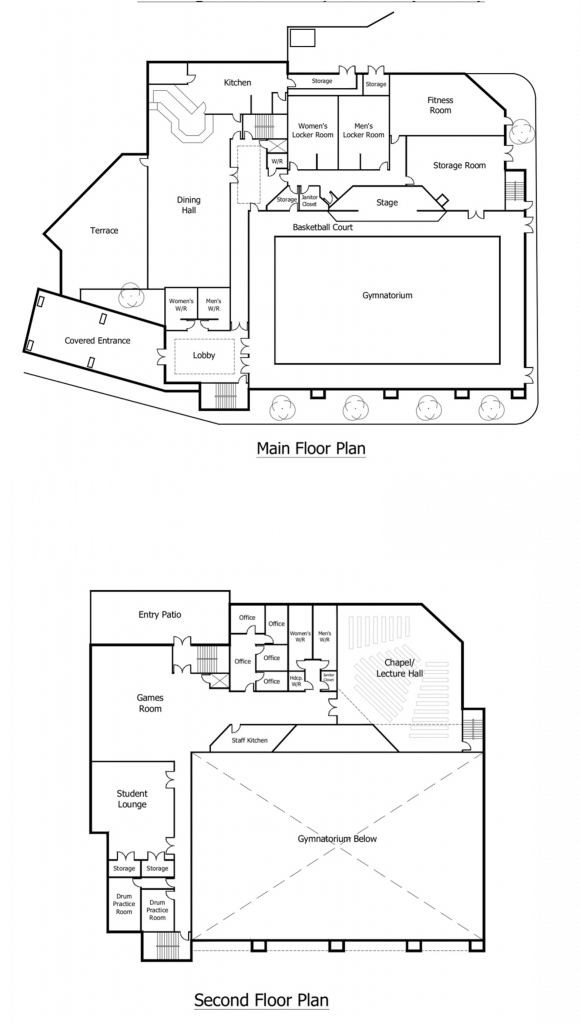
The Community Centre contains the chapel, the Bean (our on-site coffee shop) and the cafeteria. Hours at the Bean and the cafeteria are variable.

Numerous fast-food restaurants are within walking distance of campus, including a Tim Hortons and a Starbucks (in the Zehrs grocery store).

Photocopiers are in the main office and in the library in the academic building.

Faculty mailboxes are in the main office.

Classroom Setup

All on-campus Heritage classes are also live-streamed. Classrooms are equipped with a large-screen TV at the back of the room on which you will see your online students. Classrooms are also equipped with computers and projection units for any slides you may wish to use. You are free to use your own computer and to airplay your presentation to the classroom screens. A list of classroom equipment is regularly updated here.

Please ensure you arrive to class at least 15 minutes before class starts so you have time to connect. We will attempt to have IT personnel present the first few weeks to help you with this process. You can find further information on setting up a connected classroom by watching this video.

The classrooms are furnished with tables and chairs, which can be moved but must be put back at the end of class.

Classrooms also have a whiteboard and markers supplied.

Important Names If You Have Questions

  • Assistant Dean: Currently Marianne Vanderboom. Questions regarding how to write syllabi, setting up myHeritage, classroom concerns, academic policies, or any question you don’t know where else to direct.
  • Receptionist: Currently Carolyn Burgess. Questions regarding photocopying, parking, keys, and finding your way around campus.
  • Registrar: Currently Sandi Brubacher. Questions regarding scheduling, attendance records, and final grades.
  • Bookstore admin: Currently Cassie Talabis. Questions regarding textbooks.
  • Administrative Assistant: Currently Lucille Baxter. Questions regarding uploading and editing syllabi, collection of CVs and transcripts.
  • IT personnel: 
    • Currently Russ Shouldice. Questions regarding email set-up and myHeritage log-in.
    • Currently Matt Collins. Questions regarding classroom set-up.
  • HR: Currently Robin Antoine. Questions regarding contract.
  • Finances: Currently Shawn Goble. Questions regarding payroll set-up.

Using myHeritage for Online Lessons

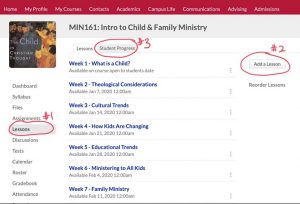
Log on to your course page on myHeritage. This is the same place you take attendance and enter grades. Along the left side is a column reading Dashboard, Syllabus, Files, Assignments, Lessons, Discussions, Tests, Calendar, Gradebook, etc. (See #1 in photo below.)

Create A Lesson

(all photos are from Marianne’s Intro to Children’s Ministry class)

  • Click on the Lesson tab. You will see this (click image for large version):

(click image to enlarge)

  • Click on the Add a Lesson tab. (See #2 in the photo above.)

(click image to enlarge)

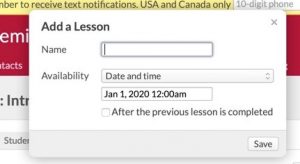
  • Give the lesson a title and set the date and time it will be available (generally the time your class would normally start). If you click “after the previous lesson is completed”, that will override any date and time you make the lesson available. I usually leave it unchecked.
  • Add one lesson for each class you have left in your semester. You will see them appear as a list, as you can see in the first photo.
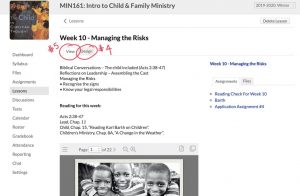
  • To give your lesson content, click on one of the lessons you have just created. It will open up to two tabs, as seen below:

(click image to enlarge)

My lesson already has content. Yours will be blank. The “view” tab (#5) is how the lesson will look to your students. The “design” tab (#4) is where you will add the content. Click it. Photo is on the next page. I don’t have time for fancy formatting!

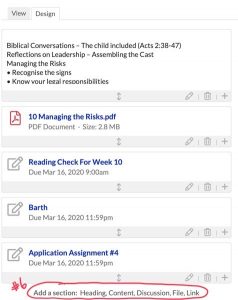
(click image to enlarge)

Again, my lesson already has some content. But you will see the line at the bottom, #6.

A heading is just that. A text box will open up and you can type directly in it, and on the view tab, you’ll have a nice, bold heading.

Content is like what you see at the top of my lesson to the left. Again, a text box will open up. You can type in it directly to give the students directions, information, whatever. I think you can even add photos to that content. The text is fully formattable. (You can underline, highlight, use italics, bold, etc.)

Discussions allow you to post a topic and have students interact with that topic and with each other. I’ll talk more about that below.

Files are your Powerpoint slides (I always save them to PDF and upload the PDF) and your audio or video files. I’ll talk about that more below.

Link allows you post a link to a website or YouTube video. More below.

Lesson Content Types

Discussions

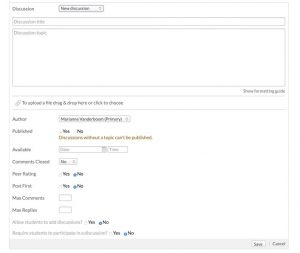
Discussions are helpful ways to get students to interact with the material and each other in lieu of face-to-face interaction. Add a discussion and this box will open up. Give your discussion a catchy title, and then in the topic box create something for students to talk about. You can also drag and drop files or photos for students to interact with.

  • Beside Published, click yes.
  • Beside available, click the date of your class.
  • Beside Comments closed, click no.

Peer rating means that students can evaluate their peers’ comments. I don’t find it helpful, but to each his or her own.

Post first means that students must first reply themselves to the topic posted before they can see their peers’ posts. This is helpful to ensure originality of ideas.

Max comments and max replies are helpful if you have a student who posts dozens of times. As if. I usually leave these blank.

Allow students to add to the discussion: I usually click no. Probably because I’m a control freak. Mostly because I don’t know what it means. It’s never hindered my discussions online.

Require students to participate in the discussion. It is important that you click “yes” for this. It is the only way we can track participation for attendance.

Files

This is what you will use to upload lecture notes (Powerpoint) and audio or video recordings.

I always save my Powerpoint slides as a PDF and upload the PDF.

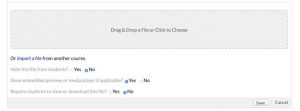
Drag and drop the files you want to upload.

Hide file from students: No. What would be the point?

Show embedded preview player: Yes. This allows the students easy access to the files.

Require students to view or download? Yes. Again, it is how we will measure lesson completion for attendance records.

Links 

If you add a link, this box will open. You can give the link a title, and then copy and paste the URL (website). The students will see the title as a hyperlink.

Again, if you use a link, require the students to click it for attendance purposes.

Conclusion

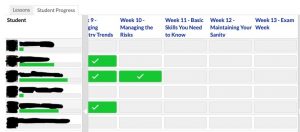
Ok, that’s your lesson. Now go back to the very first photo, and have a look at #3.  If you click on that, you will see a graph that looks like this:

(click image to enlarge)

Each lesson will have a status bar showing how much of the lesson has been completed (if you’ve required all the elements to be done). If the student has completed the whole lesson, you can then mark that student as “present” in the attendance tab. If a student has not completed the lesson (or hasn’t completed enough of the lesson), you can mark that student as absent. You may notice that myHeritage now has a “notes” section beside each student’s name on the attendance roster. If a student is finished part but not all of the lesson, you could mark that student present and make a note of how much of the lesson was complete. If the student then has another lesson that is only partly completed, you could make that note and mark the student as absent the second time.