Connecting to a Zoom Classroom

Heritage College and Seminary has introduced a new method of lesson delivery through our connected classrooms.  As of Winter 2020, we are using Zoom as the connected classroom software platform.  With Zoom, remote students can connect in via a computer with a webcam, laptop, tablet, or smartphone. Virtually any device that has internet access can be used to connect in.

Quick Start

The easiest way to connect to a classroom is to click the meeting link. They look like this.

https://zoom.us/j/116952355

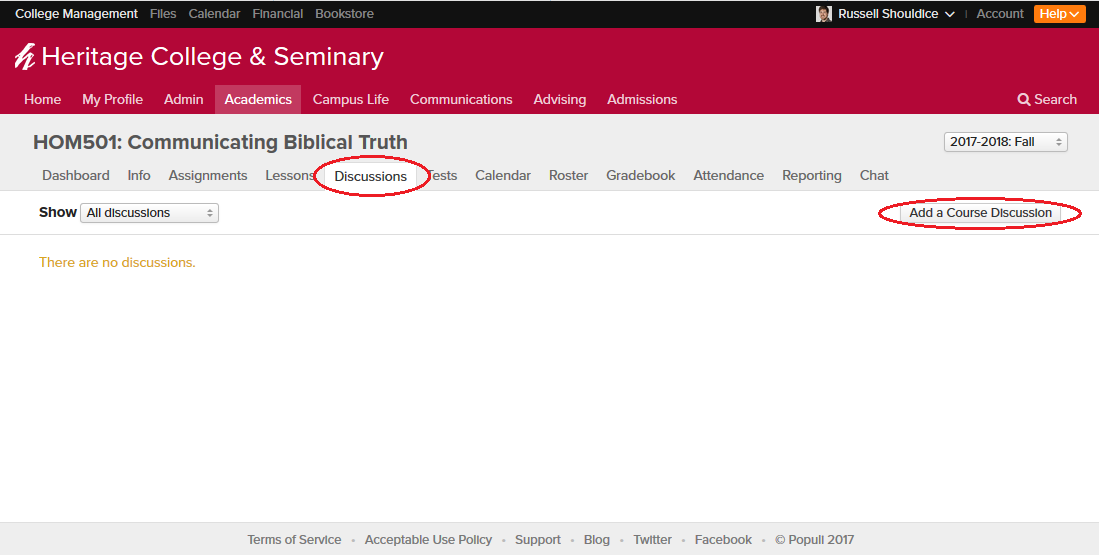
The meeting link is provided on the course page in myHeritage.  Look in the Links section.  Click on the link and follow the on-screen instructions. Your computer, smartphone, or tablet will attempt to download the Zoom App, install it and connect to the meeting.

For Assistants

The connected classroom system uses a number of hardware components (camera, microphones, touchscreen controller) and software (Zoom, Teams, Fuze, etc.).  A few minutes before each class please ensure that the hardware is turned on and working properly, and then connect it to the software conferencing platform on the in-room computer.

During the class, please monitor the remote students to ensure they can see and hear, and to note any problem they may experience.

Welcome to Heritage College and Seminary

Hey there, welcome aboard!  As you already know, we’re pretty excited to have you join the team here at Heritage.  And we have high hopes about your partnership in our continuing mission to equip men and women for life and ministry.  Here are a few things that will help you get started.

Accounts

You have a Heritage ID account and a myHeritage account.  They are two different things.  I know, we were very original about the naming of these accounts.

  • Heritage ID – This is the account that is tied to your email and will grant you access to most computers on campus.  It is made up of the username/email and password that you were given by your manager when you started.  It will also grant you access to a number of systems; office computers, your email, Microsoft Office 365, Microsoft OneDrive, Microsoft Teams, printers, ADP Workforce Now, etc.
  • myHeritage account – myHeritage (the developer is Populi) is the system that keeps track of our student records, handles course and program details, manages student billing and donations, and is also a learning management system.

Wireless Access

There are two wireless networks available on-campus.  The first is a public access network for use by our students and guests for general access to the internet.  The second is our secured network for use by our staff and faculty that provides direct access to our server infrastructure and faster upload speeds.  Details are below.

  • Name: Heritage. Open network, needs no password.
  • Name: Heritage Staff. Closed network.  See the IT Manager for access.

Other Apps & Tools

  • Office 365 is a set of cloud-based apps and tools that enable us to communicate, write, organize, and manage.  Login to Office 365 by using the URL office.heritagecs.edu.
  • Microsoft OneDrive is personal cloud storage that’s included as an App within your school Office 365.  Navigate to office.heritagecs.edu and login with your Heritage ID.  OneDrive provides you with 1TB of cloud storage and can be setup to synchronize files between your computer and the cloud.
  • Microsoft Teams is an excellent video conference and collaboration solution.  We use Microsoft Teams for inter-office chat and team collaboration on projects.  We also use Teams as a video conference tools for meetings and to delivery our live streaming courses.  There are Windows 10, MacOS, iOS and Android apps for both OneDrive and Teams.  You can access Teams directly from teams.microsoft.com or by logging into Office 365 (above) and clicking the Teams icon.
  • Your Home drive.  When you login to a Windows-based computer, your home drive will automatically mount.  The H: drive is a spot on the server where you can store your own personal files that only you have access to.  In some cases, the primary Documents, Desktop, Photos, etc. directories point to these same folders on the server.  Access to your Home drive can be setup for MacOS users with a quick trip to see the IT Manager.
  • File storage and collaboration is handled by our file servers.  One of the main locations for this is the Staff Drive, which will be mounted automatically when you log in to a Windows-based computer.  For Mac users, please see the IT Manager to get set up.
  • Heritage VPN – this tools provides a way to connect back to the Heritage campus network when you’re off-site.  If you have a Heritage laptop, chances are the VPN configuration is already complete.  All you need to do connect using your Heritage ID.  Feel free to check out the article on Connecting to the Heritage Network using a VPN for more details.

If you need tech support, please email rshouldice@heritagecs.edu or message me on Microsoft Teams.

Our Website (Outlook & Helpdesk)

There are a few easter eggs on our website that act as quick links to important locations.  So, head over to discoverheritage.ca and check out these links.

  • Outlook & Helpdesk – links to these two locations can be found in the footer of the website.  Just head to discoverheritage.ca and scroll all the way to the bottom.  Outlook is a web-based version of Outlook where you can access your Heritage email.  Helpdesk is a page that provides a useful jumping off point to the most important Apps & Tools, including to this Helpdesk site (Salo).
  • myHeritage, Moodle, and Live –  These three links live in the header of every page.  They are located there because they are the most high traffic and timely links that folks look for.

Articles

These are useful articles on how to add an email account to a Smartphone (if desired) and how to connect to a printer from any of the Windows 10 workstations.  MacOS users, please see the IT Manager.

How to Upload a Video File

From time to time, students will be asked to upload a large file such as a video clip or audio recording.  To upload a video file for your course…

  • Visit the course page in myHeritage and look on the right-hand side of the page for the Links section.
  • In the links section click on the link that says Upload Videos Files.
  • A new page or tab will open showing a Microsoft Office 365 OneDrive folder.  The folder will either be owned by your professor, or the IT Manager of Heritage College and Seminary.
  • Drag and drop your video file into the browser window to initiate the upload.
  • Note that video files tend to be rather large and the upload will take some time.  This is expected.

If you have any questions or need further assistance, please send an email to support@heritagecs.edu or bring it up with your professor.

Windows 10 Command Line Equivalent of wuauclt

I’m saving this info for my own interest.  This article has been super-helpful regarding the command line tools available for diagnosing and fixing Windows update on Windows 10.

From the follow blog, I found these amazingly useful commands.

https://omgdebugging.com/2017/10/09/command-line-equivalent-of-wuauclt-in-windows-10-windows-server-2016/

  • StartScan Used To Start Scan
  • StartDownload Used to Start Download of Patches
  • StartInstall Used to Install Downloaded Patches
  • RefreshSettings Refresh Settings if any changes were made
  • StartInteractiveScan May ask for user input and/or open dialogues to show progress or report errors
  • RestartDevice Restart device to finish installation of updates
  • ScanInstallWait Combined Scan Download Install
  • ResumeUpdate Resume Update Installation On Boot

Communicating With Other Students Using myHeritage

Question: Can we make personal contact information available to others?

Yes.  In your own profile, on the Info tab, each piece of contact info (such as an email address or phone number) can be marked as private or not.  Click the little lock icon to make an item public.  An item is by default not public.  Please see this support article for more details.  https://support.populiweb.com/hc/en-us/articles/223792047-My-Profile

Question: Can I find contact information for other students and send them a message directly?

Sort of. Heritage does not publish lists of contact info as this would be a breach of privacy.  However, you may contact a student directly who has made their contact info public.  See the answer to the above question for details on making contact info public.

Additionally, you can communicate with other students in your class by posting a comment on their bulletin board or contacting them directly using their public contact info.  To view the roster for your class, navigate to the class and click on the Roster tab.

Question: How about group discussions?

Yep.  myHeritage ships with a Discussion function with a per class scope.  Students can create discussions to facilitate communication with other students in a given class using a group discussion format.  To create a discussion navigate to the class, click the Discussions tab and click Add a Course Discussion.

Office 365 University

Students of Heritage College and Seminary are eligible to purchase Office 365 University.  A link is below.  The cost is $89 for four years.

https://products.office.com/en-ca/university

Follow the link and click the big green Buy Now button to add Office 365 University to you cart.  During checkout login with a Microsoft account, or create one.  Then you can verify your student status.  The easiest method is to supply documentation.  There is a wide variety of documentation that is accepted such as…

  • an unofficial transcript from myHeritage
  • a picture or scan of your student card
  • or even a dated current class schedule.

There are a ton of advantages to taking advantage of this, not least of which is fully installed versions of Microsoft Office on your PC or Mac, the ability to work across multiple devices (desktops, laptops, tables, or smartphones), and 1 TB of cloud storage through Microsoft OneDrive.  It’s a pretty awesome package.

Welcome to Microsoft Office 365

We are in the process of adopting Office 365 at Heritage.  Staff and faculty can now use their Heritage Desktop (think Windows) account to access Microsoft Office 365 and upgrade your desktop version of Office 2007 to Office 2016.

Office 365 is a super-useful set of tools for creating and editing documents, storing files in the cloud, and sharing and collaborating with team members.  It takes Microsoft Office to the next level.

Login

To access Office 365 please visit http://office.heritagecs.edu and login with your Heritage Desktop credentials.

  • Use your fully qualified username.  Typically this would be in the form of first-initial+lastname@heritagecs.edu.
  • So, if your name is Stu and your last name is Pendous, then your fully qualified username would be spendous@heritagecs.edu.

office-365-login

Welcome to Office 365

Check out these really great (and short – like 2 mins) videos on the basic Office 365 features.  It will help you get logged in, and show you how to create documents, save them to OneDrive, and share with others.

Six simple steps

Install Office 2016

  • To install Office 2016 click on the Install Office apps button in the top right corner.
  • Just follow the instructions to download and install Office 2016.
  • After installation, start any Office application and sign in with your Heritage Desktop account.  Again, use your fully qualified username + password to login.

Authenticating with Office 2016 using your Heritage Desktop account will tie Office 2016 in with Microsoft OneDrive and allow you to easily store documents in the cloud.

How Deep Does the Rabbit Hole Go?

Office 365 also gives you access to a whole host of additional products and features in one package.  Some of the highlights include.

  • Installed versions of Microsoft Office including Word, Excel, and more on up to 5 PCs or Macs.
  • Microsoft Office for Tablets and Smartphones.
  • Online versions of Office including Word, Excel, and more.
  • File storage and sharing in the cloud with 1TB of storage/user using Microsoft OneDrive for Business.
  • Microsoft Teams for collaboration and sharing.
  • Skype for Business for inter-office messaging and video conferencing.

For a complete list of features in our Office 365 subscription, please visit Microsoft.com.

Connecting to a Fuze Classroom

Heritage College and Seminary has introduced a new method of lesson delivery through our connected classrooms and the use of Fuze for Rooms. Fuze is an industry leading web conferencing solution similar to products from WebEx, Adobe, and Microsoft (Skype for Business). The HD video and audio quality, in addition to its ease of use, made Fuze the appropriate choice for Heritage.

With Fuze, remote students and classrooms can connect in via a conventional computer with a webcam, laptop, tablet, or smartphone.  Virtually any device that has internet access can be used to connect in.

As of this writing, we have one connected classroom, with a second on the way. We have begun streaming live classes and connecting remote students and reception has been overwhelmingly positive. To get connected to a classroom, the process is as easy as clicking on a link, adding your name and clicking Join!

Quick Start

The easiest way to connect to a meeting is to click the meeting link. They look like this.

https://fuze.me/35914311

The meeting link would have been provided via email, or would be noted in the Links section of the course in myHeritage. So, go ahead and click on the link and follow the on-screen instructions. Your computer, smartphone, or tablet will attempt to download the Fuze App, install it and connect to the meeting.

For detailed instructions on the many permutations of connecting to a Fuze meeting, have a look below. Also, if you do not wish to download and install the app, there is an option to ‘join via browser’.

More Details

To connect to a meeting, you will need the Fuze client app, which can be downloaded from here.  You will also need

  • a meeting id,
  • a meeting invite email that contains a link, or
  • a copy of the meeting link from myHeritage.

There are multiple ways to connect to a class.

  • Via your computer/laptop with a webcam.
  • Via mobile phone.
  • Old-school dial-in via a toll free number.

Chapel Workstation and Projector System

The chapel at Heritage is fixed with a workstation (computer/PC) and widescreen projector such that folks can use the workstation to project slides, video, images, and more onto the large widescreen at the front.  We use this setup throughout the school year during our chapel services.  There is also a second projector facing the back wall so that presenters on stage can see what the audience sees.

Setup the Workstation and Projector

  • Flip on both of the switches in the production booth labelled A and B.  This will turn on the sound board and amps automatically.
  • Turn the computer on and log into it with these credentials.
    • username: chapel
    • password: Heritage1
  • Lower the screen.  Find the white remote control and press the down arrow once.  You don’t have to hold the button, the screen will lower into position and stop automatically.
  • Turn on the projectors.  There are two remotes plugged into thin black cables.  The black remote is for the front projector, the grey remote is for the rear projector.   Press ON to turn them on.  They will take a moment to fire up and light the bulbs so be patient and don’t press the ON button a bunch of times in a row.
  • Turn up the speaker volume by using the MAIN fader on the sound board.

At the end of the event, please turn the projectors off by pressing the ON button twice.