There are almost unlimited options for recording video material in a professional way these days. This article discusses some best practices for setup, getting a good picture, capturing good audio, and goes through a few recording hardware and software combos. At the end, I’ll show you how to publish that material on myHeritage (Populi).
Setup
The good news is, that you can get a quality recording with almost any modern computer hardware. You can record with something as simple as a smartphone, or something as elaborate as a camcorder or DSLR camera. However, the most important element of your video is lighting.
When recording, make sure your face is front lit, rather than back lit. Try to angle yourself in the room so that the brightest lights or windows are in front of your face, and not directly behind you. If possible, angle the primary light source (called a key light) so it is just slightly off-axis to one side – no more than 45 degrees. You can accomplish this by using natural light sources like a nearby window, or light fixtures that already exist in your room. You can also opt to purchase a small light kit with a stand for greater control. This will ensure that your face is well lit and easy to see, and the off-axis angle will help provide some controlled shadows and depth for a more natural look.
Regardless of what hardware you have, do your best to mount the camera so it is just above eye level. Frame yourself in the middle of the frame with your eyes about one-third from the top edge of the frame. This will provide the most natural composition.
If you are using a smartphone or tablet, using some kind of clip or stand can help you angle the camera in the right way. Feel free to get creative with how you ‘mount’ the camera (or smartphone). No one will see your setup anyway, and spending a bit of time to get the camera in the right spot can really pay off.
If you are using a laptop with a webcam, try propping the laptop up on a stack of books to get the camera higher. A music stand can be very helpful if you have one available.
Record in a quiet room. This probably goes without saying, but I’m going to say it anyway. Audio is as important, if not more important, than the quality of your video. People will suffer through bad video if the audio quality is good. But if the audio quality is bad, it makes folks want to turn it off. So, record in a quiet room that contains some furniture. Recording in a room with many hard surfaces can make speech less intelligible and therefore harder to listen to. The build-in microphones in modern laptops and smartphones can produce good audio results, but only in a quiet room. So, record in a quiet room such as an office with a bookshelf full of books, or a bedroom with a carpet and a bed.
Always do a test recording or two (or five) and listen back to see how they sound before you commit to an entire lecture. A set of headphones, or even earbuds, can be extremely helpful in hearing how the recording sounds.
To sum up…
- Put the primary light source (key light) in the room, in front of you, and not behind you.
- Mount the camera so it’s just above your eyeline (ever so slightly).
- Record in a quiet room.
- Do some test recordings before you commit to a whole lecture.
Record
There are so many hardware options for recording nowadays. Laptops, smartphones, tablets, pocket recorders, field recorders, USB/thunderbolt interfaces, and more. The list goes on and on. The hardware commonly available today would have cost multiple thousands of dollars twenty years ago. Essentially, we all have access to a modern, high-quality portable recording studio.
Camera App on iOS and iPadOS
The Camera app in iOS and iPadOS is the easiest option that produces the highest quality results. The app gets consistently good results by recording the built-in cameras (front or rear) on an Apple iPhone, iPod Touch, or iPad.
- Setup your lighting and camera rigging/stand/pop-socket.
- Open the Camera app and frame yourself as described above.
- Choose video mode and hit record.
- Remember to test audio.
Once you’re done recording, copy the file off of your iOS device. There are a couple ways to do this.
- Copy the file directly to your computer by plugging it in over USB.
- Upload the file to cloud-based storage such as iCloud, Microsoft OneDrive, or Google Drive. Then download the file to your computer.
Alternatively, you can upload the file directly from your smartphone to myHeritage. See below in the section called Publish.
Other Options on iOS
iMovie
You can also use iMovie to capture quality recording from the build-in cameras. iMovie gives you more control over the recording settings but is harder to use.
Filmic Pro
This is an iOS (and Android) app built by a third-party that gives the film maker complete control over your recordings. You can tweak the resolution, framerate, bitrate, audio, and other settings. It comes at a cost, but is worth it if you need that level of control.
MacOS and the Webcam
If you own a MacBook or an iMac, you are blessed with a device that has all the hardware built-in to get decent quality recordings. Below are a few apps that can help you capture the magic.
iMovie
This guide isn’t meant to be a full-blown tutorial on how to use iMovie, but if you have access to iMovie, it’s an easy way to get started recording and get professional results quickly with a
- In iMovie, open File -> Import Media…
- In the left column select FaceTime HD Camera, your webcam will be displayed.
- Press the Record button in the middle and record your clip. Press it again to stop.
- Click Close.
- In the My Media view, your new clip will appear.
- Import it into a timeline (below), do any necessary trimming or adding other clips, or titles.
- Choose the Share button in the top-right of iMovie to export your video to a file.
QuickTime
MacOS comes pre-installed with QuickTime. You can use QuickTime to capture your webcam and built-in microphone. To capture a movie in QuickTime, try this.
- Find and launch the QuickTime Player app.
- Open File -> New Movie Recording.
- Click the red record button.
- Save and upload your movie file to myHeritage.
Publish
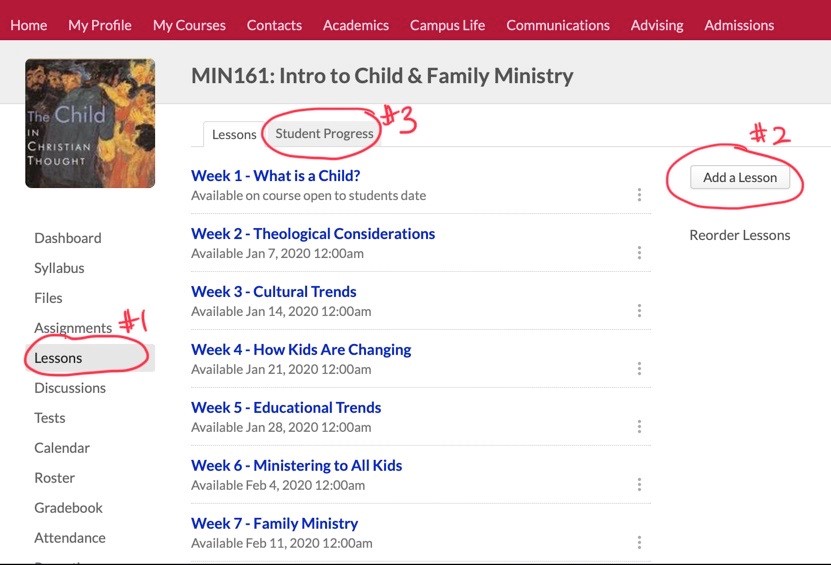
At Heritage, we use myHeritage (Populi) to publish our course content. For your course, this can be done from the Lessons tab.
Upload them from your computer
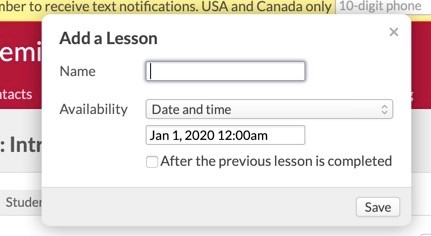
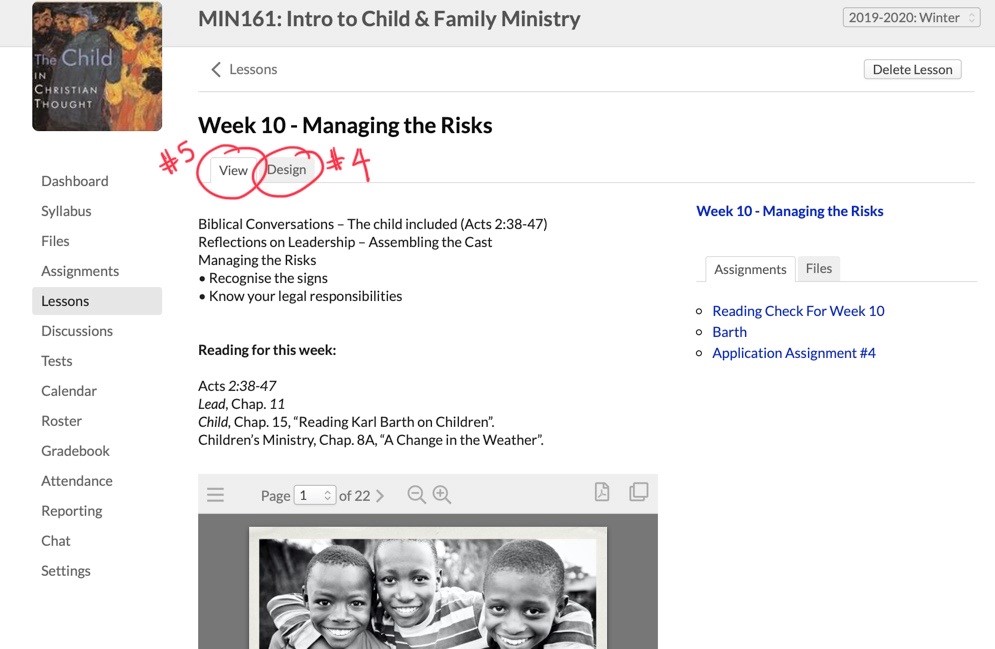
- Click the Add a Lesson button or open an existing lesson.
- Click the Design tab to open the design view.
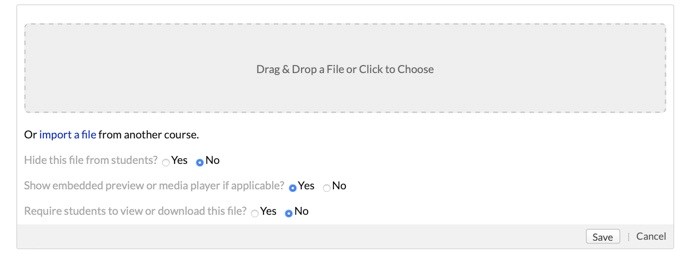
- Choose to Add a Section and click File.
- Drag and drop the file from your computer into the area that says Drag & Drop.
- Once the video file is uploaded, click Save. If this is a video file, the size is likely huge, so be patient.
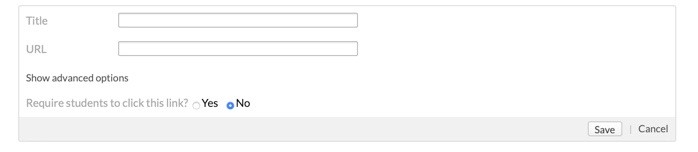
- There are other options in this view like marking a file as required.
- When you save the file, Populi kicks off an encoding process (much like YouTube’s encoding) to get it ready for multiple device types.
Upload them directly from your phone or tablet
If you’ve recorded your file on a smartphone or tablet, you can upload them directly to myHeritage.
- Open myHeritage is a browser (Safari, Firefox, Chrome, etc.) and login with your myHeritage account.
- Navigate to your course and open the Lessons tab.
- Touch the Add a Lesson button or open an existing lesson.
- Touch the Design tab to open the design view.
- Choose to Add a Section and click File.
- Touch on the area that says Drag & Drop a File or Click to Choose. This will open the file explorer on your platform.
- For example, on iOS choose Photo Library. Find the video you took (or edited) and touch Done.
- Once the video file is uploaded, click Save.
Populi has published a more detailed article on this topic called How to embed audio, video, and other kinds of files in a lesson. Feel free to check it out for more info.